How To Use The Lightroom Before And After Tool
One of the most essential photo editing tools you need to become familiar with is the Lightroom Before And After comparison tool. It will help you quickly see how much you’ve changed your original image since you first cropped it in Lightroom and made a ton of changes to it. This will help you determine what else you may still need to edit in your photo before it’s a masterpiece.
There are several ways to view Before and After in Lightroom. Let’s break them down.

Quicklinks
The Lightroom Before And After Shortcut
The quickest way to see Before and After in Lightroom is to use the backslash key [\].
This keyboard shortcut will give you an instant, full-sized view of how your image started out. This works in Adobe Lightroom CC, Lightroom Classic and all previous versions of Lightroom.
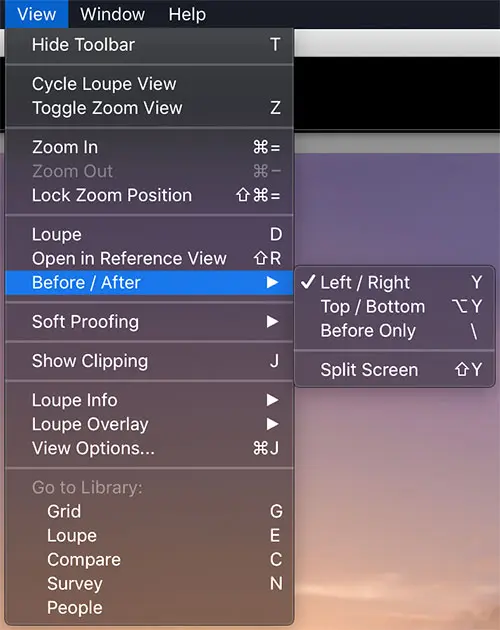
In order to cycle the other Before And After views in Lightroom Classic and prior Lightroom versions, use the following keyboard shortcuts:
- Before Only [\]
- Left/Right [Y]
- Top/Bottom [Alt + Y] Windows / [Option + Y] Mac
- Left/Right Split Screen [Shift + Y]
The last three options in the list above are currently not available in Lightroom CC. This is discussed in more detail below.
How To See Before And After In Lightroom Classic & Prior Lightroom Versions
To access the Before And After tool, you’ll need to be in the Develop module first. If you’re not already there, select a photo from your Lightroom Library and press [D] on your keyboard to enter the Develop Module.
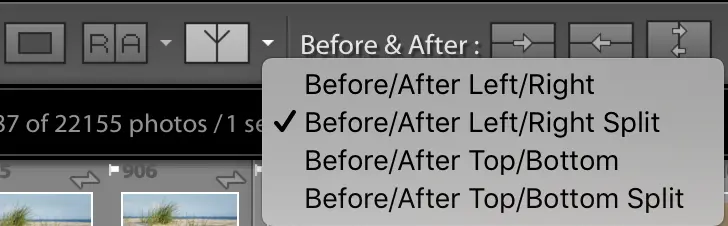
If you don’t see the button on the bottom left of the Develop Module that has a “Y|Y” on it, click the small triangle under the image and choose View Modes. Now you’ll be able to choose the Lightroom Before And After comparison view you prefer.
Side By Side Photo Comparison
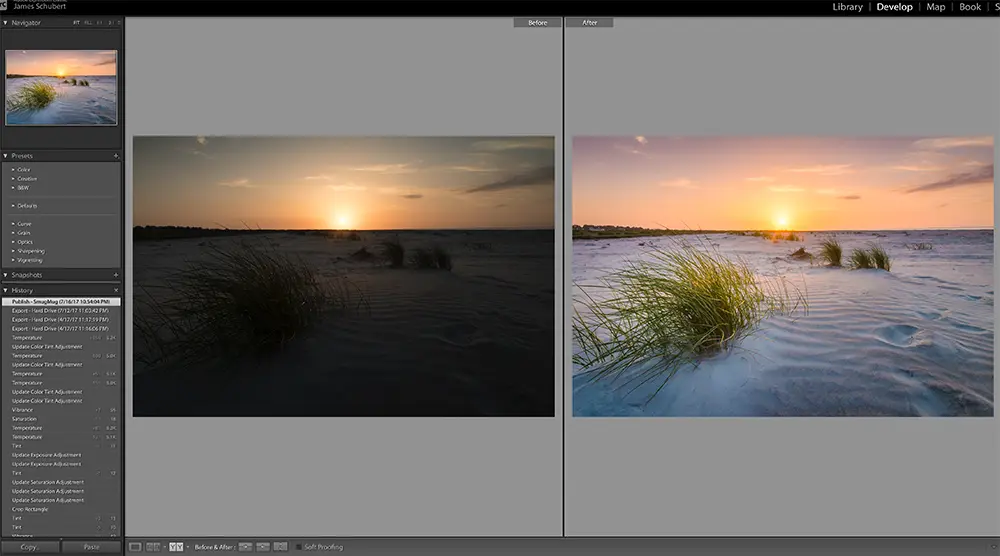
Besides viewing a photo’s Before state by itself, the next way to compare your original image to your edited one is to view a side by side comparison. To do this, simply click on “Before/After Left/Right” in the Before & After tool.
You can also simply press “Y” on your keyboard to quickly jump to the Left/Right image comparison. Pressing “Y” again will take you back to your edited image.
Top / Bottom Comparison
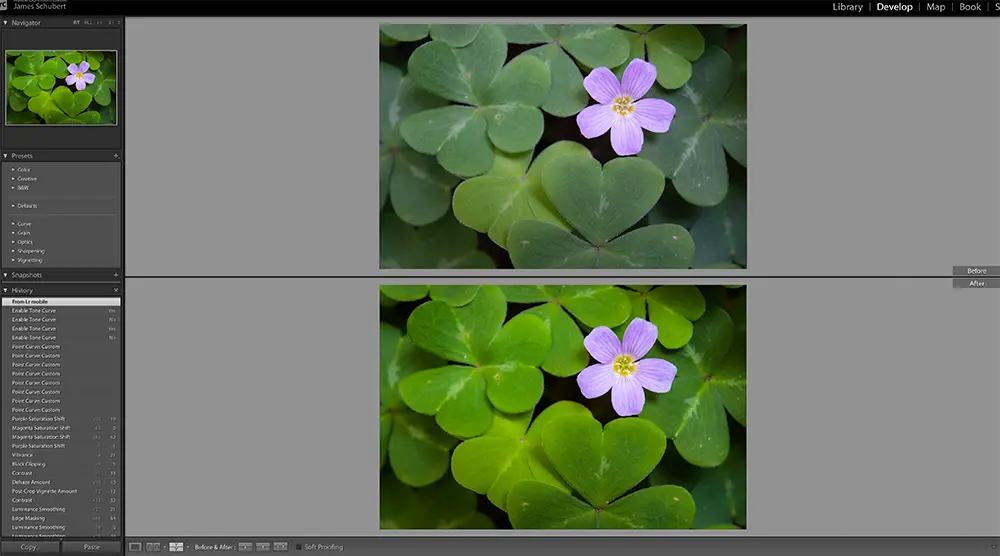
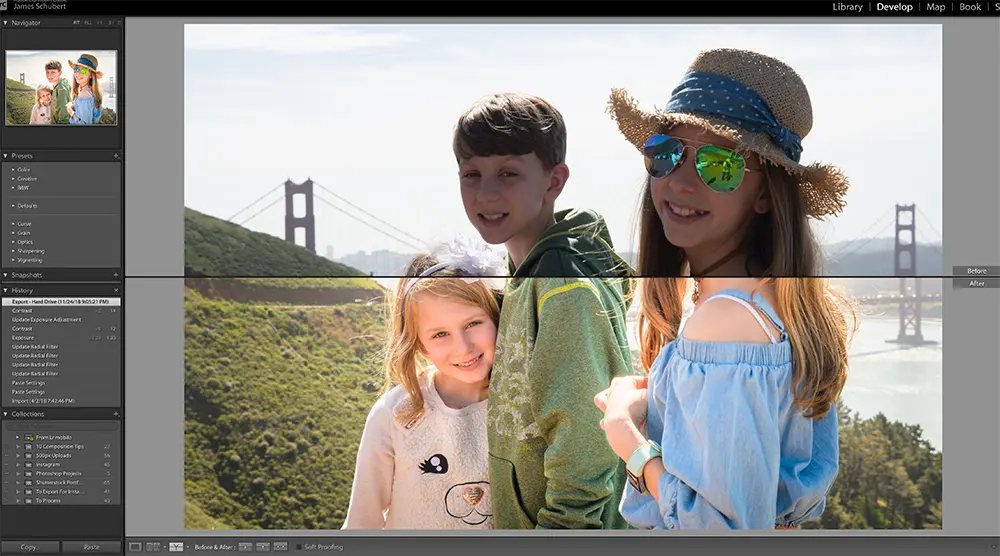
The next way to view a before and after comparison in Lightroom is the Top/Bottom view. To activate this view, select “Before/After Top/Bottom” from the Before & After tool or press [Alt + Y] on Windows or [Option + Y] on Mac.

This will display your original image on top and your edited version on the bottom. This works especially well for horizontal images.
Split Screen Comparison
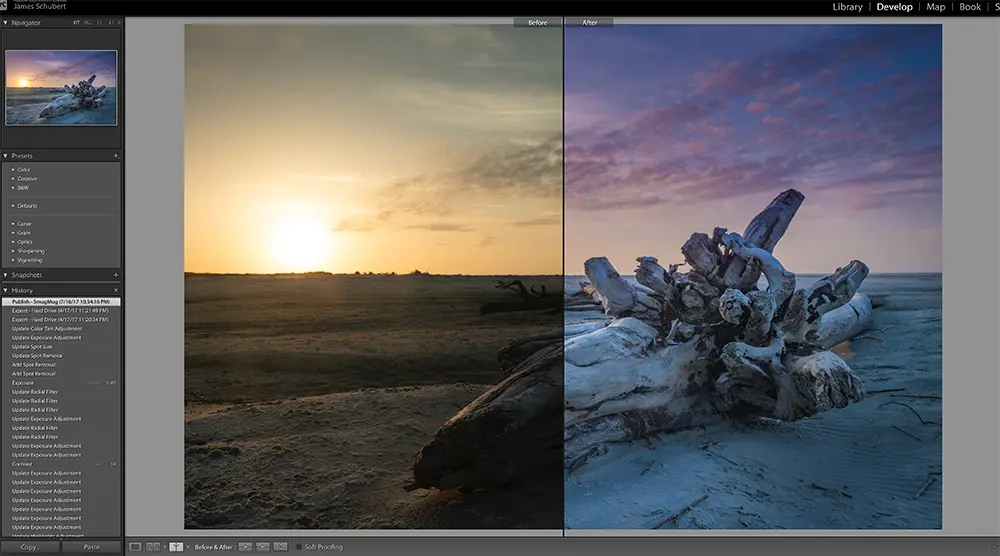
Finally, another great way to view your original image as compared to your edited one is to activate Split Screen view. To activate a Left/Right Split Screen view, click “Before/After Left/Right Split” from the Before & After tool or press [Shift + Y] on your keyboard.
This mode allows you to see your entire image on it’s own, but with half being unedited and half being edited. This is convenient if you want to make sure you’re not overdoing it with your edits.
For instance, you may use this view to ensure you’re satisfied with the overall color temperature of your photo or that you haven’t overly exaggerating skin tones.
You can also view your image in Split Screen mode from Top to Bottom. To do this, just click “Before/After Top/Bottom Split” from the Before & After tool or press [Alt + Y] on Windows or [Option + Y] on Mac.
How To Change The “Before” State
It’s great to be able to compare your current edited photo with the original. But what if you want to compare it to an edit you made halfway through your post processing?
You can!
Here’s how to change the “Before” State during any of the photo comparisons we’ve covered in this post:
- Activate a “Before & After” comparison view.
- On the left side panel, click “History” to expand a list of your past edits for this image.
- Click and drag any edit listed onto the “Before” section of your active comparison.
Boom! Now you’ll be able to see the difference between any edit you’ve made compared to your most recent state.
How To See Before And After In Lightroom CC
Crazy enough, Lightroom CC currently only has the option for users to view a full-sized version of your original image. There is no way to view this as a side-by-side, top/bottom or split screen comparison.
You can, however, use the Versions tool which allows you to keep track of how your image looked at different stages of your editing. To do this, just click on Versions at the bottom right of the Edit panel. You’ll be presented with two options, Named and Auto.
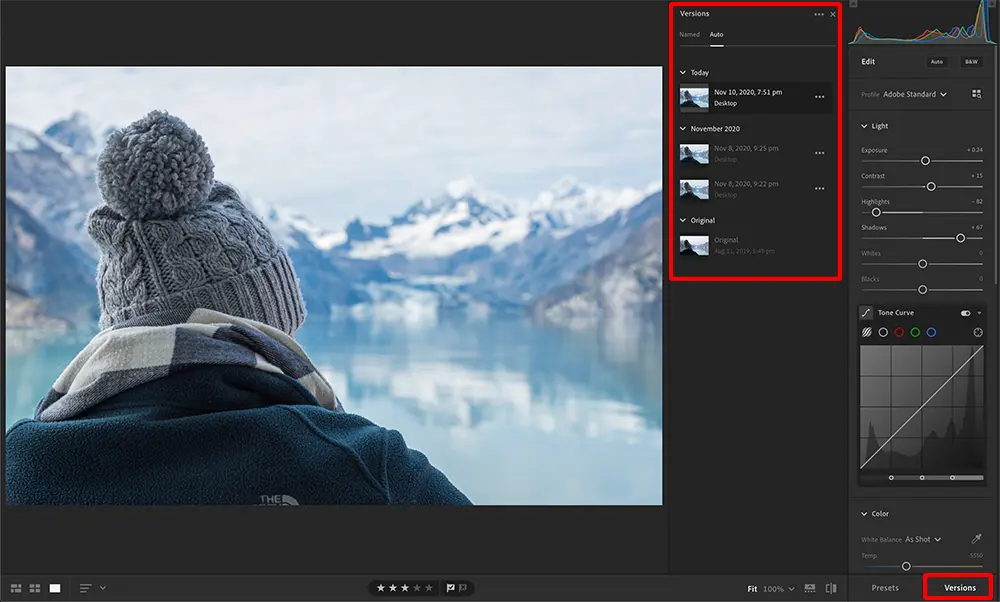
The Named option allows you to create a version (a virtual copy) of your image in it’s current state of edited-ness (sure, that’s a word!). You can then click on that version at any time to compare it to where you were at that moment versus your photo’s current state. This is super useful if you want to try out different styles or concepts with your photo.
The Auto option will automatically save different versions of your photo at regular intervals as you edit. So you if you don’t like the direction you’ve gone in your last few edits, you can revert back to an earlier version of your photo until you’ve found where you want to pick up and try again.
Before And After In Lightroom Recap
The quickest and easiest method for comparing your original image to your edited image is by pressing the [\] key.
Other than that, just follow the instructions we’ve outlined here to view a side-by-side comparison, a top/bottom comparison and a split screen comparison.
And remember, you can always change the “Before” state to see your current edited image compared to any edit you’ve made during your editing process.
Happy editing!