How To Crop In Lightroom Like A Professional
Ready to learn how to crop in Lightroom like a professional photo editor?
In this lesson, I’ll show you the basics of cropping in Lightroom. And I’ll also teach you some advanced methods to help you crop for maximum visual impact.
Let’s start by making a basic straighten and crop of your image.
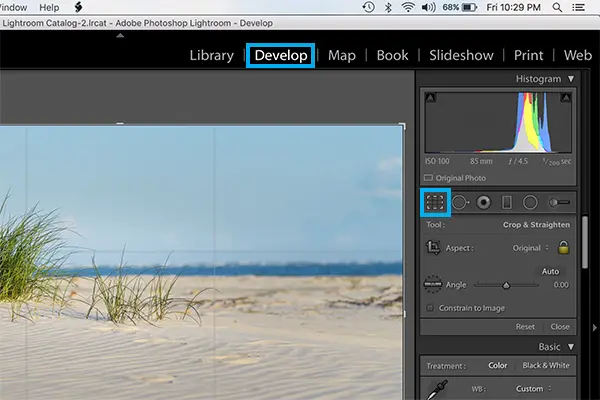
1. Open The Crop Panel & Straighten Panel
While in Develop mode, click the icon for the Crop Panel located in the toolbar on the right side. To use the keyboard shortcut, just press (R) to open it.
2. Straighten your photo first
It’s a good idea to straighten your photo before you try to crop it. And there are several ways to do it. But I’ll show you the two easiest and most efficient ways. Let’s start with the Angle Slider.
Method 1: The Angle Slider
Click the Angle slider in the Crop & Straighten Panel.
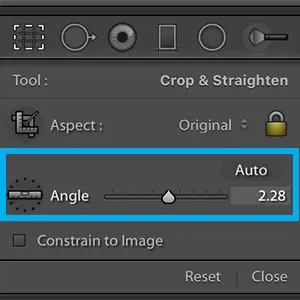
When you do this, you’ll notice a grid overlay pops up over your photo.
As you drag the Angle slider left and right, you’ll see your photo tilt.
Try to find something you know should be level in your image, like the horizon. Use that as your guide for determining when your photo is as level as possible.
Method 2: The Straighten Tool
If you have a strong straight line running through part of your photo, try using the Straighten Tool for even more precise results.
Just click the Angle Tool and an icon of a spirit level will appear.
![]()
While hovering over any straight line in your image, click and drag the Angle Tool to trace that line.
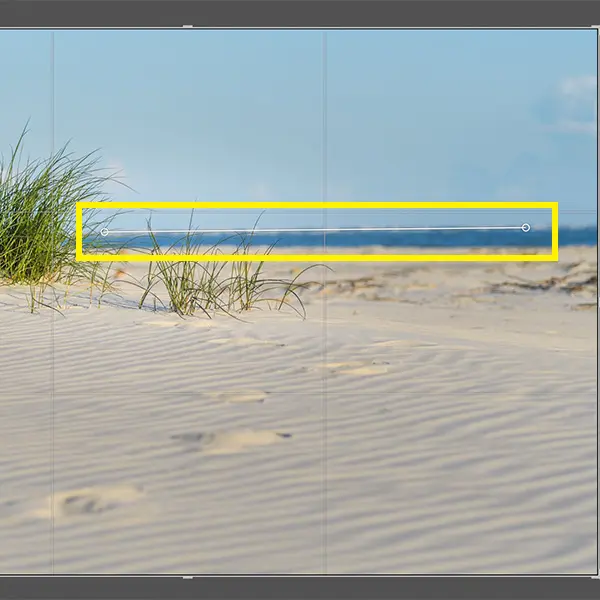
When you release, your image will automatically tilt the appropriate degree so that the line you traced is now horizontally leveled.
3. How to crop in Lightroom
Okay, now the creative part.
Now that we’ve straightened things out, it’s time to crop our photo.
First, I’ll show you the basics. And then I’ll show you how the pros crop their photos in Lightroom to create visually strong compositions.
Step 1: Click and drag to size your crop
Just drag one of the corner handles or one of the small thick lines on the sides or top/bottom of the cropping frame to make your crop larger or smaller.
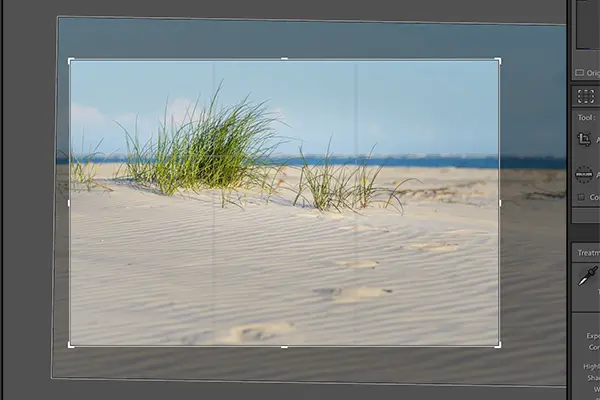
Step 2: Position your cropping frame and crop your image
Place your mouse somewhere inside the cropping frame until you see the hand icon. Then click and drag the cropping frame to position it where you want.
Then press Enter on your keyboard.
Voila!
You just cropped your image.
Step 3: Resize or reposition your crop if needed
If you’re not happy with the crop you just made, simply click on the Crop & Straighten icon to open the panel again. Then resize and/or reposition your cropping frame until you’re satisfied.
Then press Enter.
The great thing about Lightroom is that it’s a non-destructive environment. Meaning, you can go back and tweak edits like this as many times as you’d like without destroying your image.
How To Crop In Lightroom For Maximum Visual Impact
Before we dive into some more advanced stuff, I think it’s important you understand the purpose behind cropping images.
Why We Crop
Eliminate Distractions: Removing elements that distract your viewer from the subject in your image is a must. Decide first what your main subject is. Then get rid of anything that might take away the emotional impact you’re trying to create in your shot.
Remove distracting elements like:
- light poles
- telephone wires
- people
- cars
- buildings
Emphasize Your Subject: Whether you’re shooting landscape photography, portraits or anything else, you need decide what your main subject is before you begin dialing in those camera settings. But once you’re in post processing, you’ve got to work with what’s in front of you. So take a close look at what’s around your subject. Then experiment with different crops that emphasize it.
Position Elements To Draw Your Viewer In: I’ll cover more of this below. But for now, pay attention to all the elements in your shot. And visualize how to crop your photo so that those things draw your viewer’s eyes from one end of your frame to the other.
Choose An Aspect Ratio For Your Crop
Depending on the look you’re going for, you can choose a different aspect ratio to suit your needs.
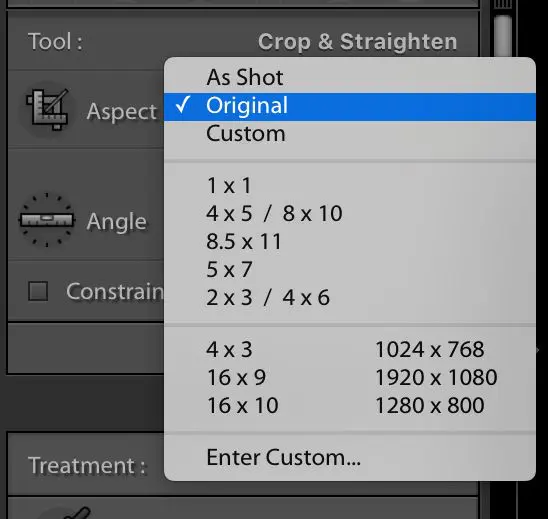
Using Original will keep the same ratio as your original file.
If you want a square crop, use 1 x 1. This is great for sharing photos on Instagram.
As you can see, there are several predetermined choices. But you can also enter your own aspect ratio by choosing “Enter Custom”.
By default, Lightroom has the aspect ratio locked. But you can click on the icon of the lock to make your aspect ratio unconstrained.
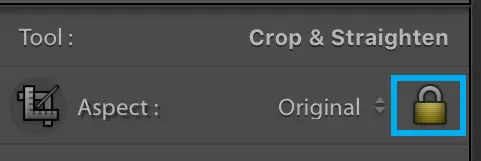
This way, you can freestyle your crop to make it look exactly the way you want.
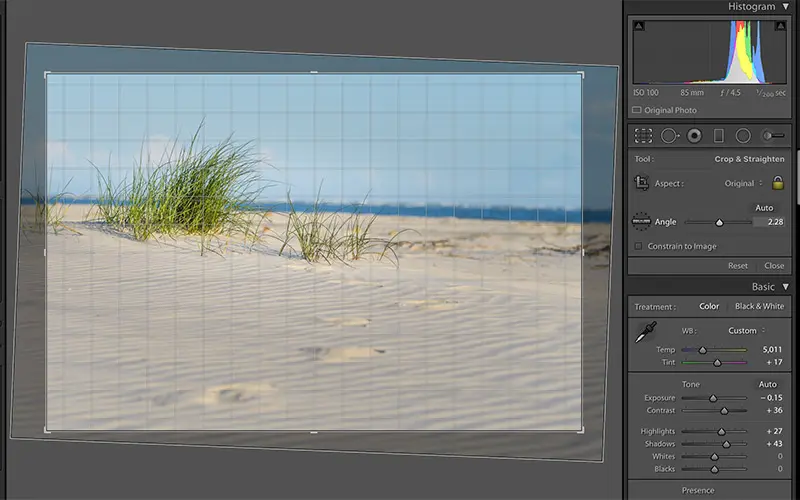
Use The Rule Of Thirds
The rule of thirds is simply a way of dividing an image into 9 different points overlaying two horizontal and two vertical guidelines on your image. Placing important elements along these intersections creates a natural sense of interest and impact in your photo.
Most DSLR cameras have a setting which allows you to view these intersecting lines in your viewfinder while you’re taking your shot.
But Lightroom also natively overlays the Rule of Thirds grid on your image while you crop it. This can help you tremendously when deciding how to crop in Lightroom.
When using the Rule of Thirds, pay attention to the strong elements in your image. If you have a natural horizon line, crop so that either the upper or lower horizontal grid line falls on it.
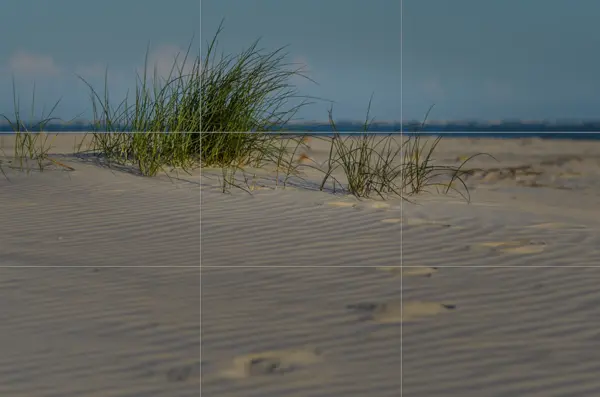
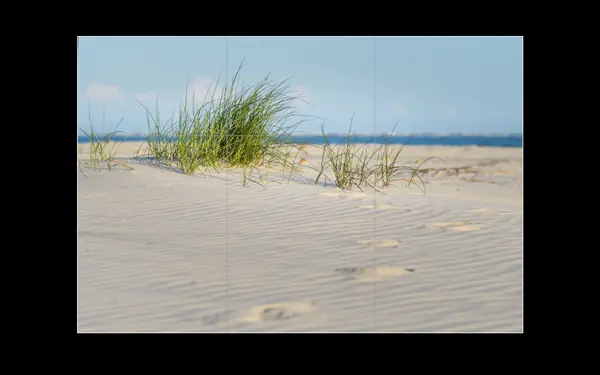
In this photo I took on a recent beach photoshoot, I’ve lowered the exposure so you can see the Rule of Thirds grid.
I put the horizon line on the top horizontal grid line. I placed the sea grass on the upper left intersection. And some of the more dominant footprints are on the bottom right intersection.
Check out this article for some more rule of thirds examples.
How To Crop In Lightroom Using Lights Out View
One of the challenges in learning how to crop in Lightroom is being distracted by what’s outside of your cropped area while you’re cropping.
An easy way to eliminate this distraction is to use Lights Out View when you crop.
Just press “L” twice to use the keyboard shortcut for Lights Out View.
This will darken everything on your screen that falls outside your cropping area.
Then, when you drag your image around to position it within the cropping frame, you’ll see only exactly what your finished crop will look like.
Now that you know how to crop in Lightroom, go experiment.
Getting your crop right in camera is always preferred. Just like taking tack sharp photos is better than trying to sharpen soft images in post processing.
But the power Lightroom affords you in cropping can give you some leeway while you’re composing your shots in the field.
Now that your external hard drive is hotter than a stack of pancakes and you know how to crop in Lightroom, experiment a little. Then let me know in the comments below about any tricks you’ve picked up to make this process easier.
Happy cropping!
P. S. If you’re new to landscape photography, you might want to check out our “Start Here” page.
Thanks for the little tutorial on cropping.
I’m fairly new to photography and appreciated this clear & concise explanation!
My pleasure, Rob! Glad it was helpful.