The Ultimate Landscape Photography Guide For Beginners
Ready To Master Landscape Photography?
Have you ever seen breathtaking landscape photography in a magazine and wondered, “How did they get that shot?!” Or have you found yourself scrolling endlessly through amazing Instagram images thinking, “Man, I wish I could take shots like that.“
That’s why you’re here, isn’t it? You want to know how to create breathtaking photos that inspire other people.
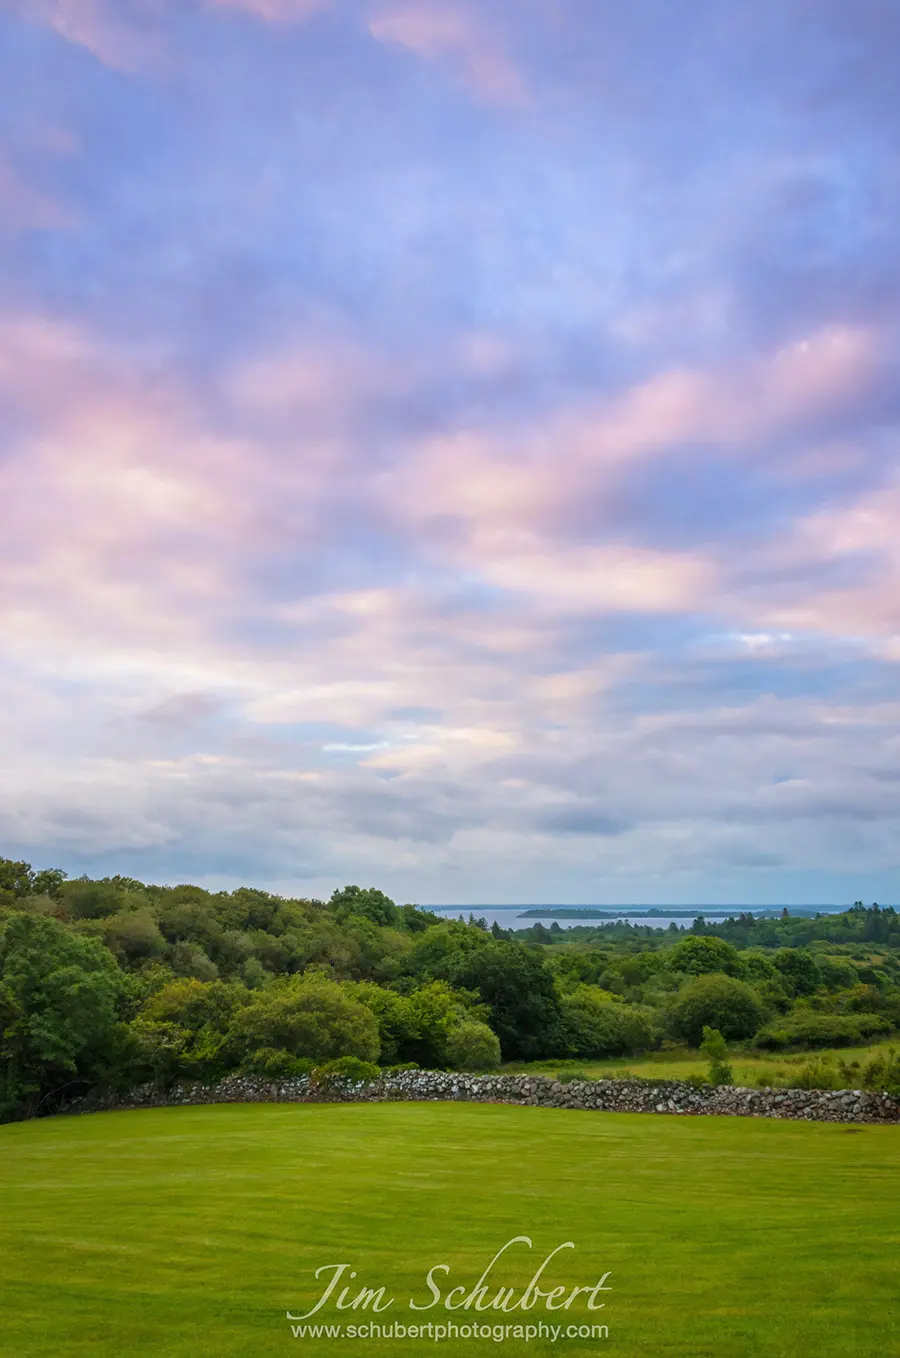
Nikon D7000 | ISO 100 | 26 mm | f/11 | 1/500 sec
In the past, only seasoned professionals had the experience and money to travel the world and afford the photography equipment needed to create such artwork. Limitations like using camera film and gaining access to a dark room also made it more difficult to get started in the craft. But today, anyone with a DSLR camera and a laptop can become the next Ansel Adams if they know what they’re doing.
So if the only thing holding you back from getting started with landscape photography is learning how to use your camera and post processing your photos, let’s jump start your creative journey now!
Quick Links
- Essential Camera Equipment
- Landscape Photography Settings
- Understanding Exposure Settings
- How To Choose The Right Camera Settings Every Time
- Composition Techniques
- Best Times Of Day For Landscape Photography
- How To Plan A Photo Shoot
- Laws & Regulations About Outdoor Photography
- Main Types Of Landscape Photography
- How To Edit Your Photos
- Best Places To Share Your Photos Online
- How To Make Money With Landscape Photography
- Visual Recap [Infographic]
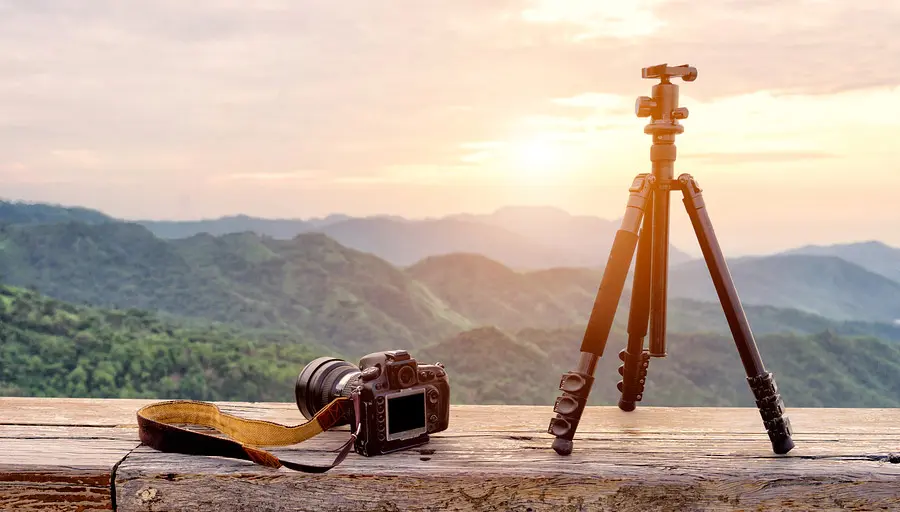
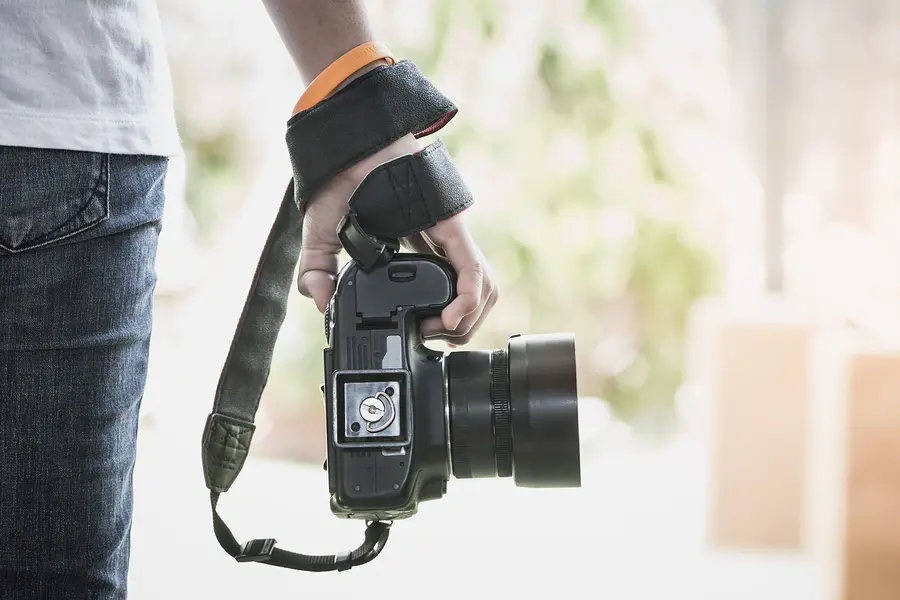
Essential Landscape Photography Equipment
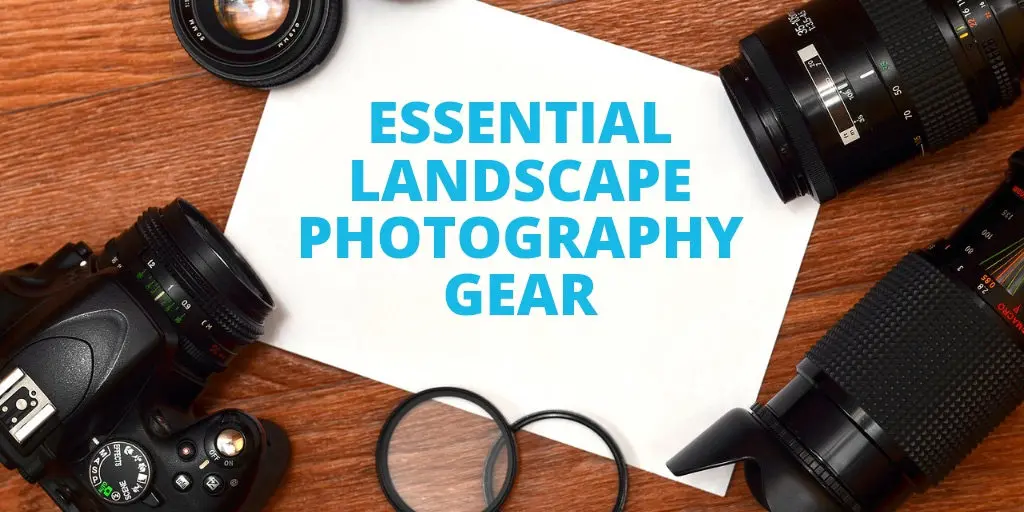
First, let’s dispel the myth that you need the most expensive camera gear to create stunning landscape images. Not true!
In fact, you can take gorgeous pictures with the cheapest DSLR camera. It’s about how you use your camera that counts. We’ll show you how to do that shortly. But first, let’s discover the landscape photography gear you need to take stunning shots.
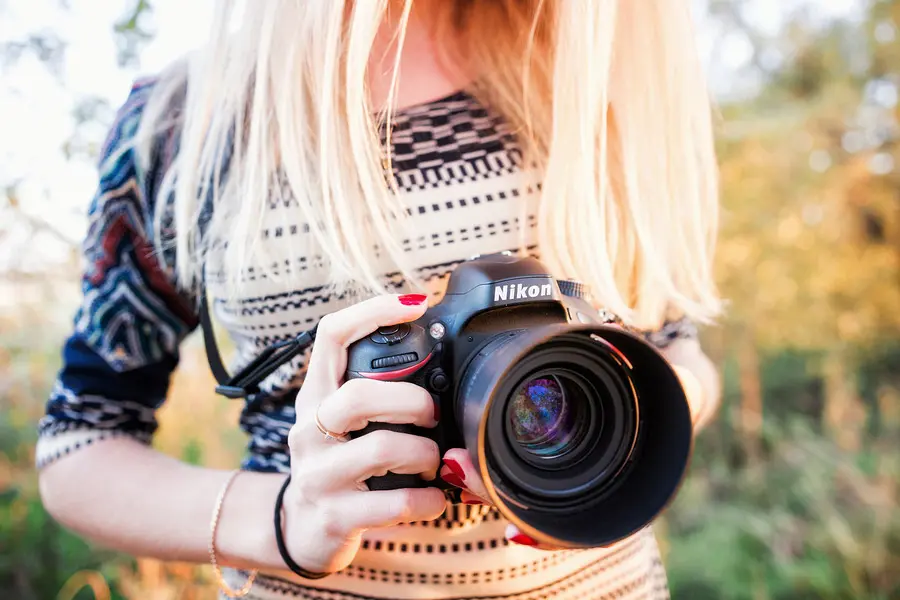
DSLR Camera
Duh. But seriously, this is your beginning point. All the lenses you buy will depend on the brand of camera you have and whether it’s a cropped sensor or full frame camera. But don’t sweat this. You can’t go wrong with the big names like Nikon, Canon, Sony, etc.
 Nikon D3400: 22.4 MP, ISO 100-25600
![]() , 5 fps (continuous), 3″ screen, 0.87 lbs
, 5 fps (continuous), 3″ screen, 0.87 lbs
What to look for in a DSLR camera:
- Large sensor for capturing as much image data as possible (At least 15 Megapixels)
- Large ISO range (at least up to 6400)
- Fast continuous shooting speed (5 frames per second or greater)
- Large monitor size for previewing your image files (tilting LCD touchscreen preferred)
- Lots of Auto Focus points to get clear crisp shots every time
What’s the best affordable camera for landscape photography?
That depends on what type of landscape photography you want to take. While you could spend a ton of cash on expensive gear, if you’re a beginner starting out, you may want to look at an entry level DSLR camera. They will do just about everything you want and you won’t need to spend a lot of money. And if you learn to use it right, it could end up being the best camera for landscape photography you’ll ever own.
Best Entry Level DSLR Cameras
Table could not be displayed.
Lenses
Your camera may or may not come with a kit lens. If so, great. But it won’t serve you well in every landscape shooting scenario you’ll want to practice. Here are the main types of lenses you’ll need.

Canon EF-S 10-22mm f/3.5-4.5 Lens: Lightweight, superior Auto Focus performance
![]()
Types of lenses used in landscape photography:
- Wide Angle Zoom Lens
- Wide Angle Prime Lens
- Ultra wide Angle Fisheye Lens
- Telephoto Zoom Lens
- Macro Lens
Most landscape photographers start out with a good wide angle lens to capture sweeping landscape views like mountain ranges or beach settings. But I would recommend looking into some of the other ones mentioned above.
What to look for in a good lens:
- Lightweight and compact size (when possible)
- Excellent optics
- Low maximum aperture (f/1.8, f/2.8, f/3.5)
- Vibration reduction
Nikon D500 | ISO 400 | 16 mm | f/11 | 1/160 sec
What’s the best lens for landscape photography?
In short, the best lens is the one that will best help you photograph what’s in front of you. When you buy a DSLR, it usually comes with a kit lens that is sometimes called a walkaround lens. That’s because it’s usually a standard zoom lens that has a nice range from wide angle to telephoto.
The next lens you might want to consider is a wide angle zoom lens. This will have a wider maximum field of view which is great for capturing big scenes like mountain ranges, beaches, fields, etc.
Best Wide Angle Zoom Lenses
Table could not be displayed.
Tripod
Every landscape photographer needs steady tripod to get sharp photos. A tripod will minimize or eliminate camera shake that will otherwise cause your photos to be blurry. You don’t need an expensive one.
 Zomei Z668 Tripod: Lightweight carbon fiber, fluid ball head, detachable monopod
![]()
What to look for in a tripod:
- Lightweight
- Compact when folded
- Camera mount that is quick and easy to lock in and release
My favorite all purpose tripod is the Zomei Z668 tripod. It’s lightweight, has a fluid ball head and a detachable monopod. Can’t go wrong with this one!
Camera Filters
UV Filter: A simple low cost UV filter will protect your camera lens from long-term exposure to harmful UV rays. But it will save you a ton of money in case you accidentally crack your lens. Better to replace a $10 UV filter instead of an expensive lens.
 Tiffen 77mm UV Protection Filter
![]()
Circular Polarizing Filter: This filter will allow you to cut down glare coming from water or the sky or anything with a shiny or reflective surface. This will help you get a more even exposure in your image. Plus, a polarizer will add a pop of additional color to your pictures.
 Tiffen 77mm Circular Polarizer
Neutral Density Filters
ND and Grad ND Filters are a landscape photographer’s best friend. They act like sunglasses for your camera to help you take long exposure shots and create a more balanced exposure. With these filters, you’ll be able to make moving water look smooth and milky. Passing clouds will blur into beautiful trails in the sky. And you’ll be able to capture fireworks and lightning with ease.

![]() K&F Concept Square Filter ND1000 100x100mm 10 Stop Neutral Density Filter Kit
K&F Concept Square Filter ND1000 100x100mm 10 Stop Neutral Density Filter Kit
Need help choosing the right ND filter?
Check out our comprehensive guide to choosing the best neutral density filter.
Remote Shutter Release

![]()
Wireless Remote Control for Nikon Digital SLR Cameras
![]()
In addition to using a tripod, having a remote shutter release handy will further reduce the risk of camera shake. Whether you use a wired or wireless remote shutter release, you wont run the risk of bumping or moving your camera by pressing the shutter with your finger.
Cleaning Accessories
Your camera body and lenses will get dirty. Using some basic cleaning accessories will keep them free of smudges and dust that can ruin your beautiful images. Spend just a little money on a dust blower, microfiber cloth, cleaning solution and a lens pen. Or just get all these things in one convenient camera cleaning kit.

![]()
Altura Photo Professional Cleaning Kit
Memory Cards
Since modern day DSLRs crank out 20+ Megapixel files for each image, you need plenty of memory storage loaded in your camera. One of the most important features to look for when buying memory is the speed at which data can be created and reviewed. This is called the read/write speed. Standard memory cards have around 90 MB/second speeds. Newer XQD cards have read/write speeds over 400 MB/second.

SanDisk 128GB Extreme SDXC UHS-I Card
Camera Backpack
A good camera backpack is essential for any landscape photographer. Depending on what you want to shoot, you may be carrying a lot of photography gear. So you want to make sure you’ve got a hiking camera backpack that can accommodate everything you need.

![]()
Lowepro ProTactic 450 AW Camera Backpack
What to look for in a camera backpack:
- Space enough for 1-2 cameras and 2-3 lenses
- Laptop compartment so you can process images while you travel
- Easy top and side access to your camera gear
- Comfortable enough for all-day travel
- Built-in rain cover
Landscape Photography Settings
Here’s where the magic happens. It’s time to learn how to use your DSLR for landscape photography. Here are the settings you need to learn before you start shooting.
Is it better to shoot in Raw or JPEG?
RAW is a format that captures the most amount of data your camera will allow. The files are large. But this provides you with more information to work with when post processing in Lightroom and Photoshop. There’s no pre-processing of a RAW file before it leaves your camera.
JPEG on the other hand, is a more compressed image file. While you might think it’s good to have a smaller file size, the name of the game in photography is to have more image data to use. JPEG files also get a little pre-processing in camera like a color and contrast boost. That’s not good if you want maximum control over your image files when it’s time to start editing them.
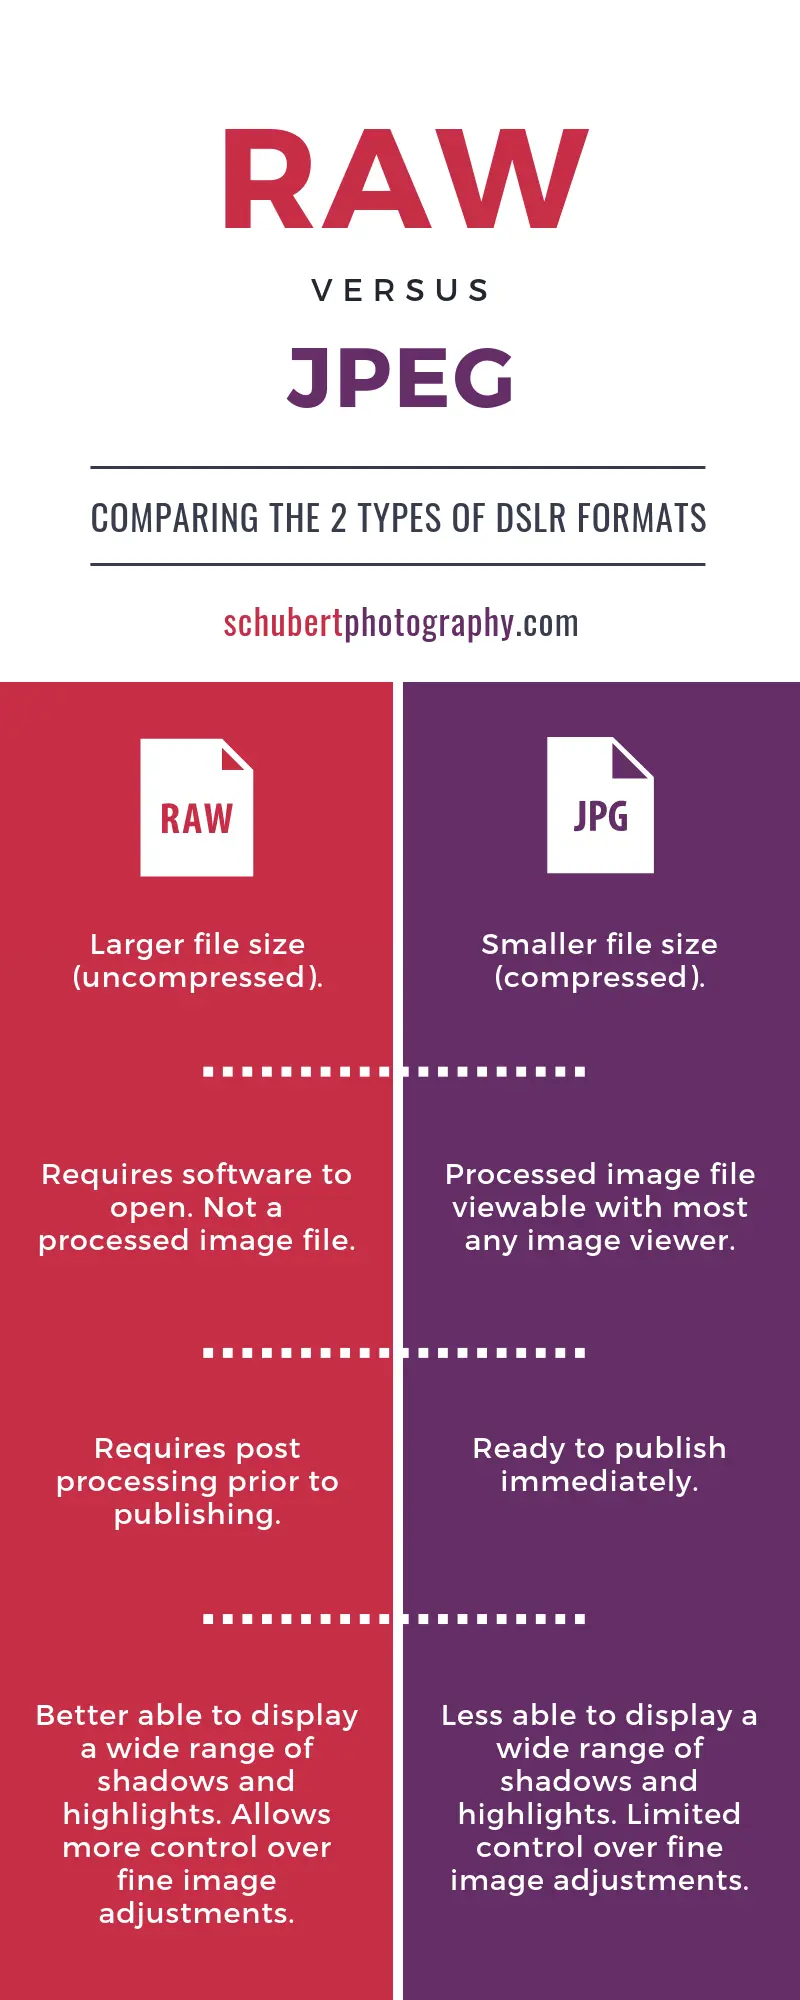
Make sure to change the file capture settings in your camera to RAW before you start shooting.
Focus Options
The two main options for focusing on your subject are Manual Focus and Auto Focus. While you might want more control over your focus, I wouldn’t start in Manual Focus. You’ll have time to experiment with that as you improve your photography skills.
There are other settings you’ll be more focused on (see what I did there?) at first. So I recommend letting your camera’s built-in auto focus capabilities help you get sharp pictures as you’re learning how to use your DSLR.
Image Review Settings
The most important setting I would change in your camera from its default is in your image review settings. After you’ve taken a picture and press Play in order to view it, cycle through the view options to turn on the histogram view.
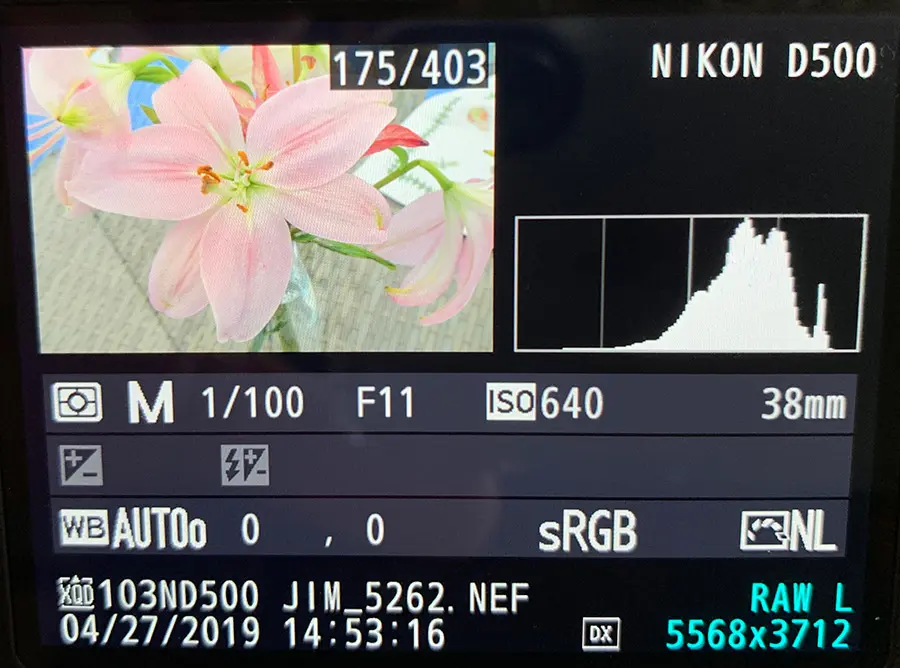
A histogram shows you a graphical representation of the tonal values in your image. It shows you the amount of tones for each level of brightness in your photo.
DSLR cameras and editing software like Lightroom display tonal brightness information in a range from blacks to shadows to midtones to highlights and finally to whites.
Turning on the histogram view will help you quickly determine if the picture you just took is properly exposed. Here’s an image exposure comparison. As you can see from the histograms, the image data is more centered on the properly exposed photo. While the data is pushed to the left and right respectively for the underexposed and overexposed photos.

Understanding Exposure Settings
A photographer’s unique ability is to memorialize both the physical and emotional elements of a moment in time. Just like an artist works with paint, a photographer works with light.
How does a DSLR camera take pictures?
Your camera has a sensor that capturers light. And that sensor is hidden behind your camera’s shutter, which act like curtains keeping a room dark. When the shutter opens, light is revealed, or exposed, to the sensor, capturing the scene in front of your lens. That exposure data is simultaneously recorded as an image on your camera’s memory card.
Taking beautiful landscape photography pictures comes down to capturing a scene that is properly exposed.
Share this Image On Your Site
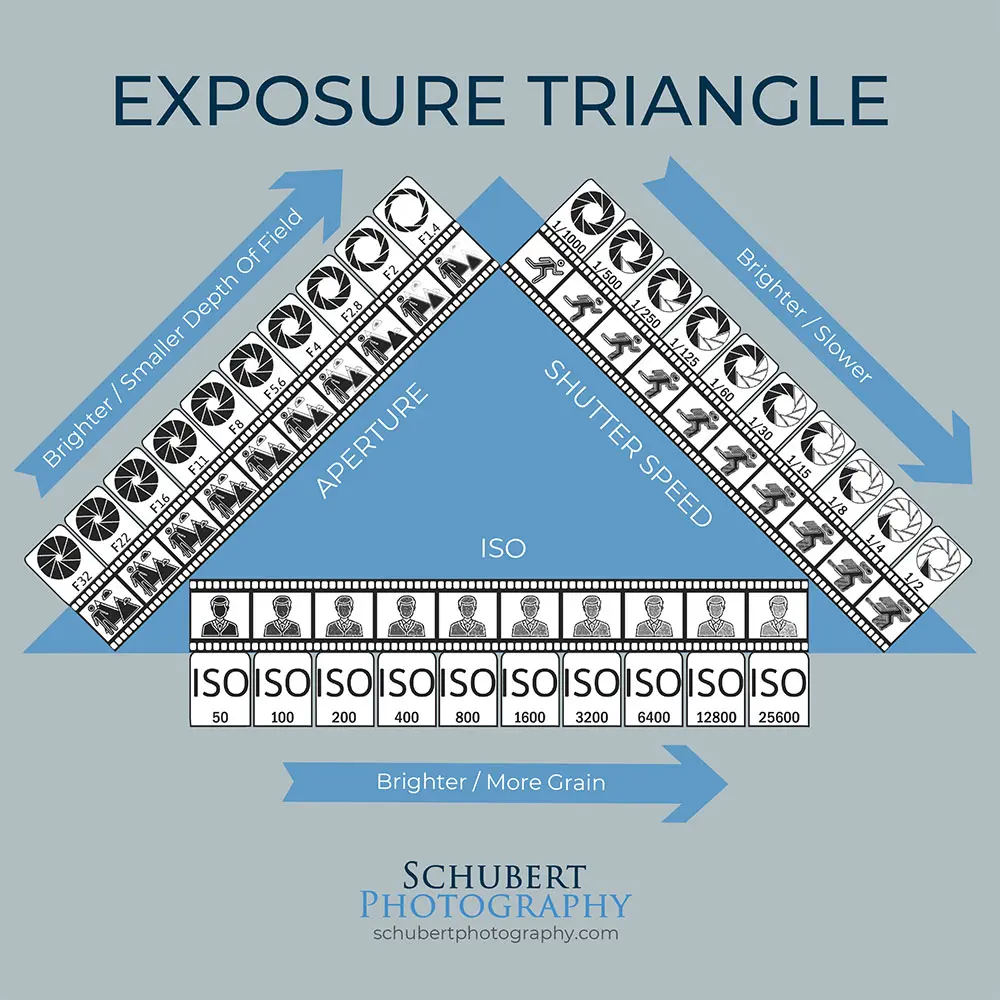
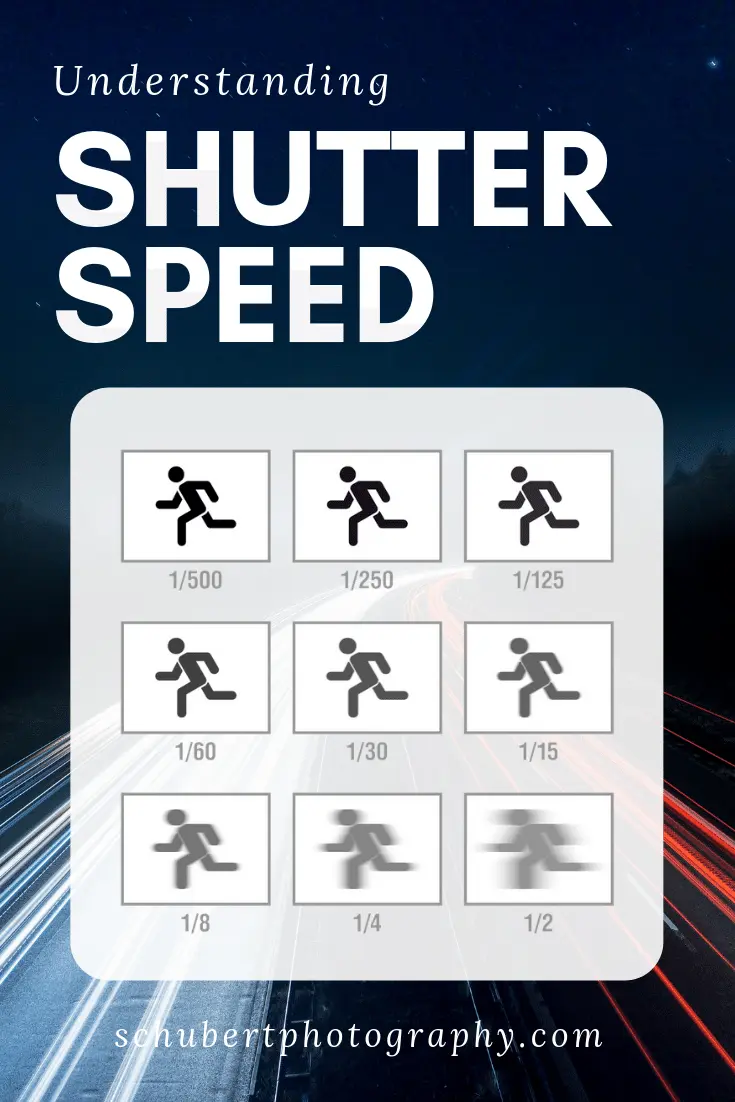
Shutter Speed
Shutter speed is the amount of time your camera’s shutter remains open when you press the shutter release button. It’s the first piece in the Exposure Triangle that determines how much light your sensor is exposed to with each shot you take.
Think of the shutter as your camera’s eyelids.
Nikon D500 | ISO 100 | 80 mm | f/9 | 1/200 sec
Imagine this. You start with your eyes closed for a minute on a bright sunny day. Then you quickly open and shut them as fast as you can while looking up at a tree. What do you see? Maybe a faint visual imprint of the tree’s outline?
Next, you open your eyes for about 10 seconds while still looking up at the tree. After you close your eyes this time, what do you see? Probably a much more defined tree made of light. You can count individual branches and see the tree in your mind very clearly.
This is the same way a camera shutter and sensor interact. The shorter the time period the shutter is open, generally the darker the shot will be. The longer the shutter is open, the brighter your photo will be.
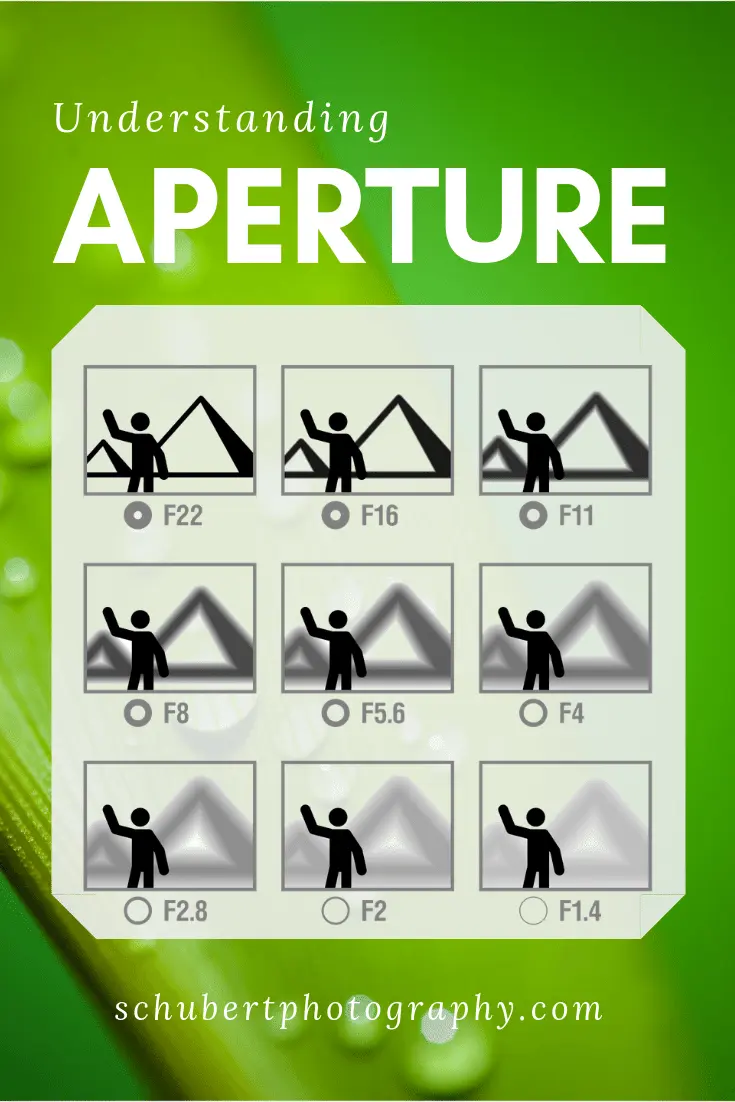
Aperture
A camera’s aperture operates in much the same way your eye’s iris works. In the example above, if you looked skyward on a sunny day, your iris would automatically start to contract leaving your pupil looking much smaller. And if you get out of bed in the middle of the night without turning on any lights, your iris would open wide to let what little available ambient light into your pupil so you could see better in the dark. This is the same with your DSLR camera.
Nikon D7000 | ISO 100 | 70 mm | f/5 | 1/160 sec
So with landscape photography, which depth of field do you normally want?
Well, that depends on what you’re photographing. If you’re trying to get everything in focus from foreground to background, you’ll want to use a smaller aperture (higher f-stop number) like f/11 – f/22. But if you’re trying to isolate the petals of a flower, you’ll want to use a wider aperture (lower f-stop number) like f/5.6 – f/1.8.
Here’s a handy aperture chart to help you visualize how f-stops affect your picture.
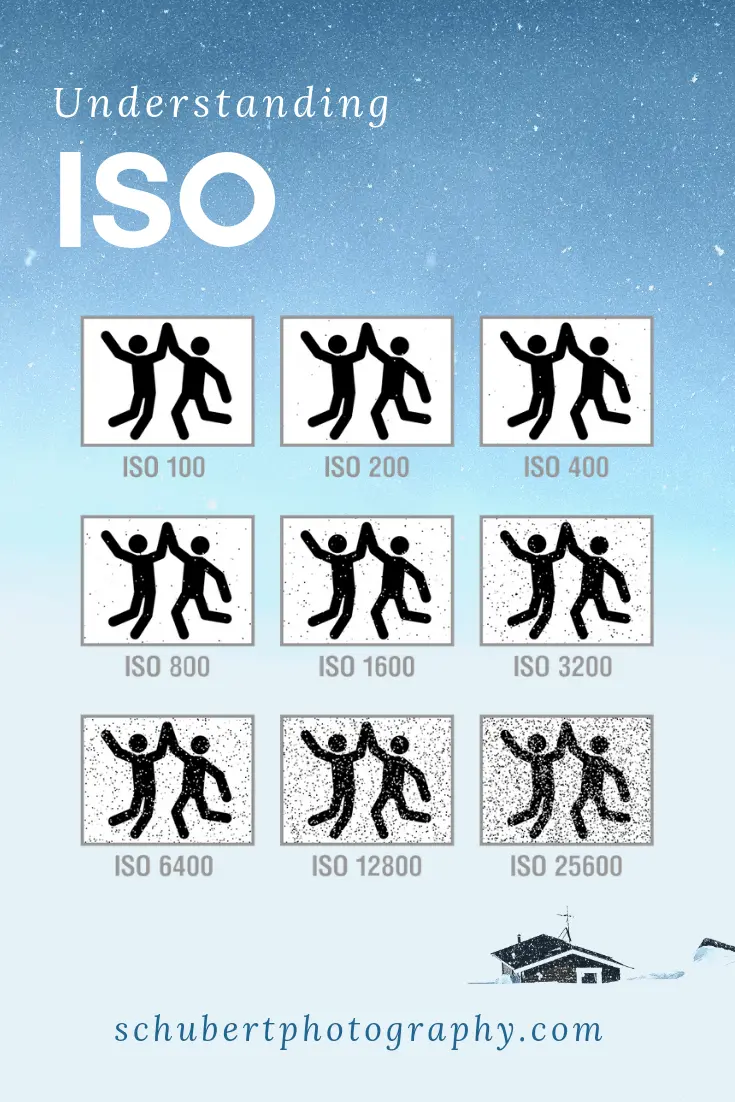
ISO
ISO is the measure of your camera sensor’s sensitivity to light. The lower the number the finer the noise, or grain, in your photo. The higher the number, the more noise you’ll see in your images.
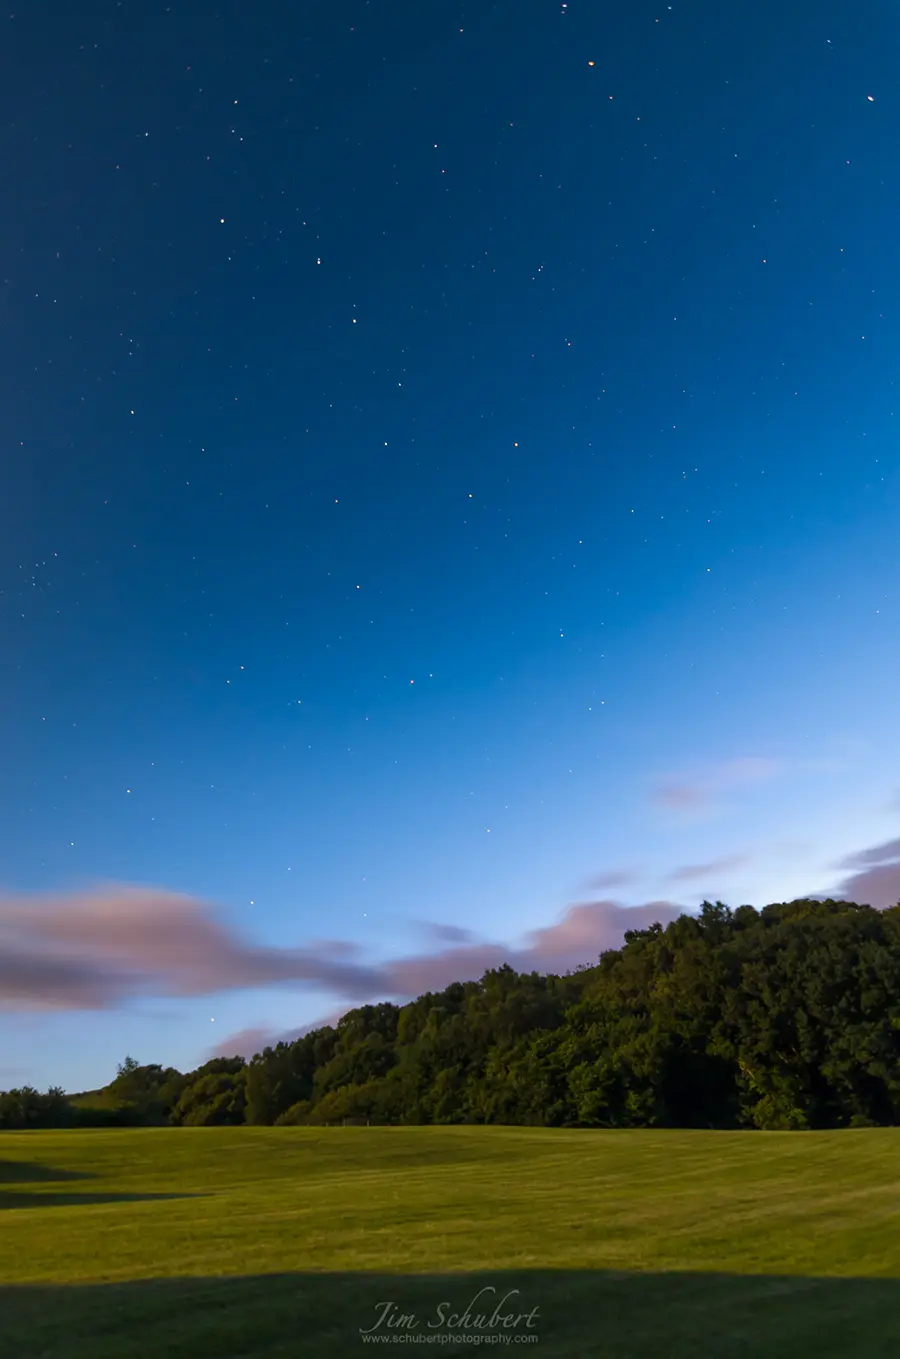
Nikon D7000 | ISO 320 | 11 mm | f/2.8 | 30 sec
Not all scenes are well lit and will require you to bump up your ISO in order to take a good exposure. Bright sunny days may allow you to set your ISO at the lowest number, usually 100 ISO. Whereas shooting just after sunset or at night when it’s dark may require an ISO level of 800 to 1600 or more.
Pro Tip:
How To Choose The Best Camera Settings For Landscape Photography Every Time
It’s one thing to understand the elements in the Exposure Triangle. But it’s another to know when to use them. This is what makes it so hard for most beginners to start using Manual Mode confidently. So let’s make this easy!
The fastest way to decide what camera settings you need for anything you want to photograph:
Step 1: Decide what is most important about your scene. The one or two things you can’t compromise.
Example 1: You want to make a waterfall look smooth and milky white. So you cannot compromise on setting a slow shutter speed of 4 seconds or longer. In this case aperture and ISO can be flexible.
Example 2: You’re shooting a twilight scene and need the most light possible with no noise or grain in your image. So you cannot compromise your aperture setting because it needs to be as wide open as possible, or the lowest f-stop number. And you cannot compromise on ISO because you don’t want noise in your image. In this case shutter speed can be flexible.
Example 3: You’re shooting a wide angle shot of a mountain scene on a sunny day, and you want everything from foreground to background to be clear and crisp. So you cannot compromise on setting your aperture to at least f/8 or above. In this case your shutter speed and ISO can be flexible.
Step 2: Adjust the other non-critical exposure elements to achieve the optimal exposure for your image.
These two steps will make it so much easier for you to get out of Auto and start using Manual Mode!
Landscape Photography Composition Techniques
Nikon D7000 | ISO 100 | 56 mm | f/10 | 1/125 sec
Once you start getting used to working in Manual Mode, the next landscape photography skill to practice is composition. It’s tempting to take your camera out and just start pointing and shooting.
But if you study pictures from photographers who inspire you, you’ll start to realize there’s something special about the way they line up their shots. Something that makes them look more professional. Something that draws you in. That something is photo composition.
And landscape photography composition is all about leading your viewer’s eyes through the frame.
I wrote a detailed post about landscape photography composition techniques. Here’s a summary of those tips.
10 Landscape Photography Composition Tips
- Rule Of Thirds – Create more interest by placing your subject off center using a grid overlay that splits your image into thirds horizontally and vertically.
- Foreground Interest – Place something interesting in your foreground, especially when you have a lot of wide open space in your background.
- Leading Lines – Any line that draws your viewer’s eyes through the frame. Think meandering rivers or long roads that lead to the horizon.
- Level Horizon – It’s an easy one to skip, but make sure your horizon line is level. Or you’ll run the risk of making the viewer seasick. You can use a tripod to help you with this. Or you can easily fix this in post processing.
- Frame Within A Frame – Just like it sounds. Use elements like tree branches or curved arches to frame your subject inside your image’s frame.
- Patterns & Textures – The human eye is drawn to that which is different. So repeating patterns like a row of trees or the rough texture of a rusted ship’s hull make for a much more interesting composition.
- Negative Space – This is the space that surrounds the main subject of your photo. It can be the vast desert surrounding a herd of camels or the ocean waves keeping a sailboat afloat.
- Fill The Frame With What’s Important – If you’re shooting something interesting like the flower of a lily pad, get closer or zoom in to fill your frame with it.
- Be Aware Of What You Don’t Want In Your Frame – It can be easy to get caught up in the moment on a photo shoot. But don’t forget to look around you every once in a while to make sure you’re not getting things in your pictures you could easily avoid like power lines or people.
- Change Perspectives – Move around. Zoom in. Change from shooting horizontal to vertical. Shoot from above. Shoot from below. Just change your point of view to keep things interesting!
The Best Times To Take Pictures Outside
Nikon D7000 | ISO 400 | 18 mm | f/22 | 1/10 sec
Since photography is the art of capturing light, you need to know when the best times and worst times are to take photos. Of course that depends a lot on what you’re trying to photograph and whether it’s Spring, Summer, Fall or Winter. Light will be very different throughout the year based on the angle of the sun to the earth.
But here are some general rules for when to take landscape photos.
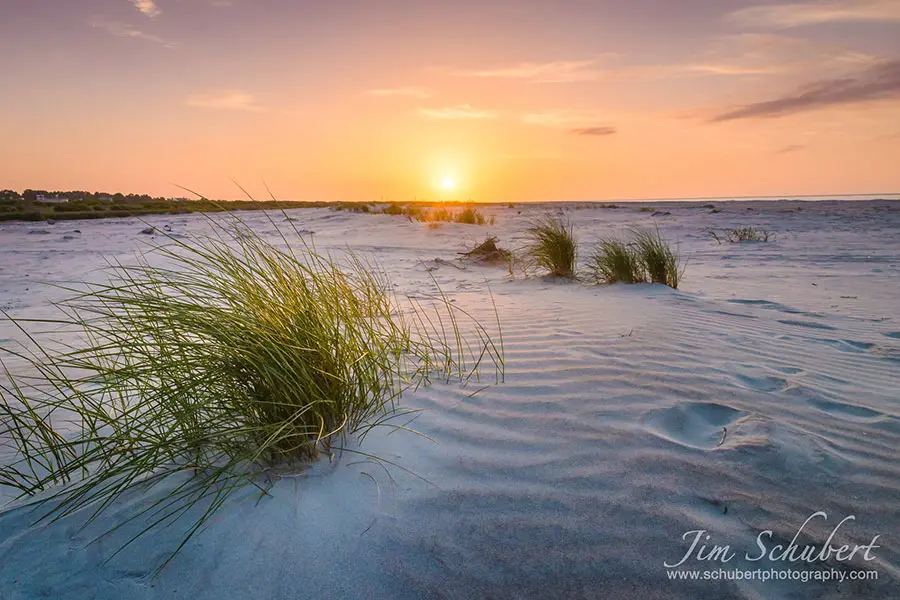
Golden Hour
Golden Hour is the time just after sunrise and just before sunset when the sun is low in the sky and casts a golden hue on everything it touches. The light during golden hour is very diffused, meaning it is spread much more evenly. This is what makes everything look magical.
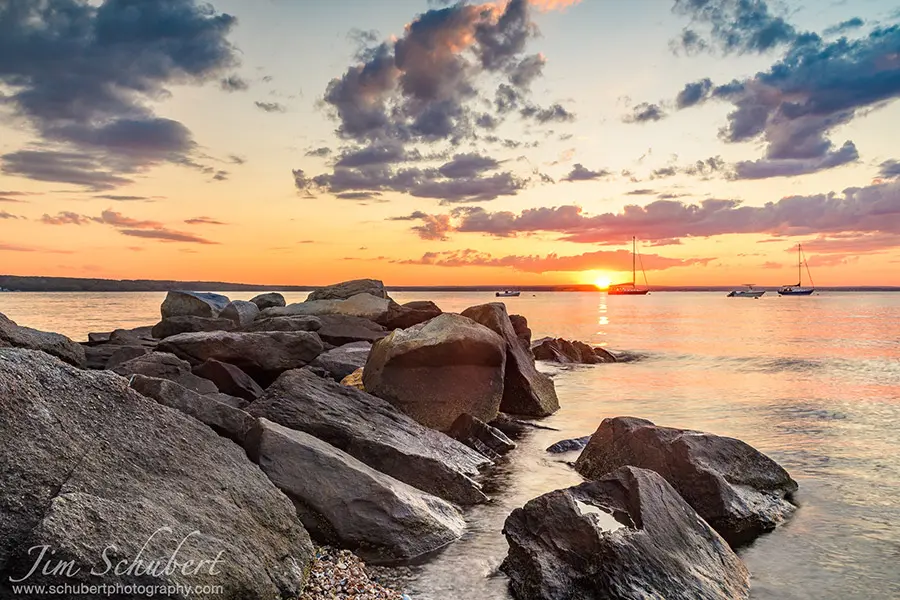
Nikon D500 | ISO 100 | 18 mm | f/10 | 1/4 sec
Golden hour is when the earth becomes one big light box, instead of the middle of the day when the sun casts more direct light that casts harsh shadows on everything.
It’s the opposite of Blue Hour, which is just before sunrise and just after sunset. Blue Hour, as the name suggests, is when the sky casts a blue hue on everything outdoors.
Golden Hour can be great for taking pictures of outdoor landscapes like:
- Beaches
- Mountains
- Deserts
- Fields
- Architecture
Midday
Now you might have heard that the worst time of day to take pictures is the middle of the day. But again, it all depends on what kind of subject you’re shooting and what the weather is like.
A cloudy day at noon has vastly different lighting conditions than a bright sunny day at noon. Clouds diffuse light and act like a giant light box. This evens out the light on your subject and makes it much more pleasing most times.
Nikon D500 | ISO 100 | 60 mm | f/8 | 1/320 sec
What kind of pictures are best to take during the middle of the day?
- Macro photography
- Forest photography
- Aerial (Drone) photography
- Seascapes
- Deserts
How To Plan A Landscape Photography Photo Shoot
Sure, photographers get lucky sometimes. But the best way to take amazing pictures is to plan your photo shoots ahead of time.
Location Scouting
Knowing what and where you want to photograph will help you pack the right photography gear. No need to carry a lot of extra weight unnecessarily. So scout your locations ahead of time.
7 Ways To Plan Ahead For An Outdoor Photo Shoot
- Instagram – Get inspiration from Instagram for the types of outdoor pictures you want to take.
- Google – Search Google for “best places for landscape photography in [your region, state, city, town, etc.]“
- Pinterest – Search Pinterest for location ideas.
- Flickr – Search Flickr for recent photos taken from potential locations you want to photograph. Flickr is also great for finding unique spots and angles other photographers have used to get awesome shots.
- TPE App – Use The Photographer’s Ephemeris mobile app to determine where the sun will be at any given location and at any given time. This is a really quick and easy way to find out when Golden Hour, sunrise or sunset will be at your intended location, without having to physically go there and check it out ahead of time.
- Moon Calendar App – Use the Moon Calendar mobile app to figure out when the moon will rise and set on any given night. It also lets you easily see which phase the moon will be on each evening. This is a great companion app whether you want to take pictures of the moon or you’re trying to find a night where the moon won’t be shining so you can take pictures of the Milky Way.
- On-Site Visit – Physically visit the location I want to shoot. Take time to walk around and make note of interesting subjects, perspectives, angles and foreground interests.
Laws & Regulations About Taking Photos In Public
Before you head out to build your portfolio of amazing landscape photos, be sure to check for any local laws and regulations that apply to photography in public places. While many public spaces are fine to photograph, there are others that require special permission or releases to be able to sell or use your images for commercial purposes.
Some things to consider when taking pictures in public spaces
Property & Model Releases – If you’re taking photos that include recognizable property or people, you’ll need to have them sign a release before you sell those photos or use them commercially. Even if it’s only a portion of the person or property. If they, or someone else, can say “Hey, that’s me in that photo!” or “That’s my house!,” you’ll need to have a release signed. The easiest way to do this is by using the Releases mobile app. You can quickly create, sign and send releases using standard templates from Snapwire, ASMP, Getty Images and Shutterstock. They can even sign on the spot with their finger!
Check Before You Photograph – Here’s a great list of locations with known image restrictions you should check before photographing with the intent to use your work commercially.
Main Types Of Landscape Photography
Nikon D7000 | ISO 100 | 135 mm | f/11 | 1/320 sec
Landscape photography includes many different styles of outdoor pictures. So if this is a niche your interested in, there’s practically no end to the fun you can have trying out various genres.
Experiment With These Common Styles Of Landscape Photography
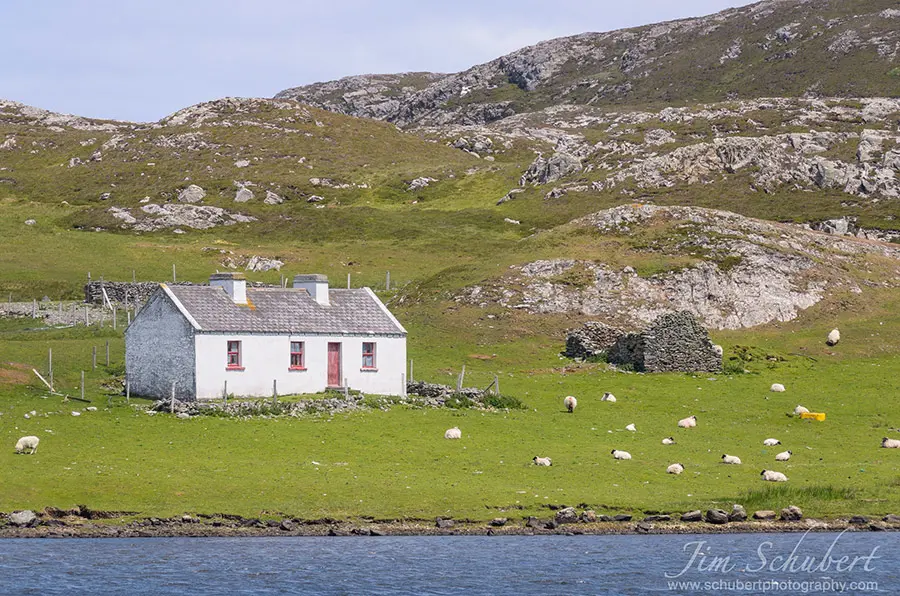
Rural – Think country, hills, meadows, fields, lakes, rivers and plenty of other locations off the beaten path.
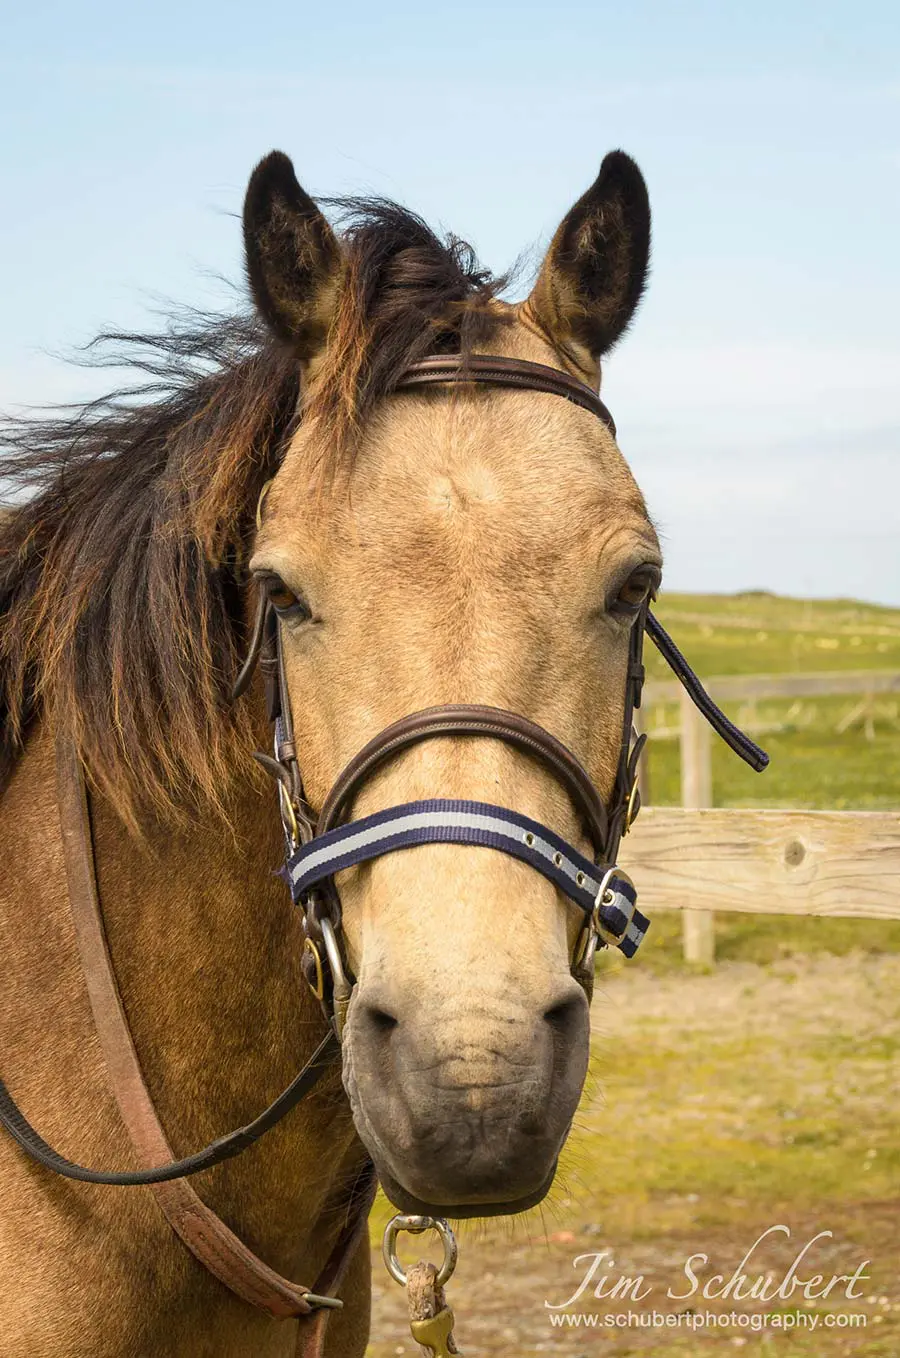
Forest – This can be anything from your local woods to tropical rain forests, cloud forests, deciduous and evergreen forests. Plus all the wildlife you’d normally find like deer, bears, birds and all manner of woodland creatures.
Mountain – Pictures of mountains from afar are the first thing that come to mind. But mountains are where you’ll find waterfalls, boulders, snow and plenty of sure-footed wildlife and majestic birds like eagles and hawks.
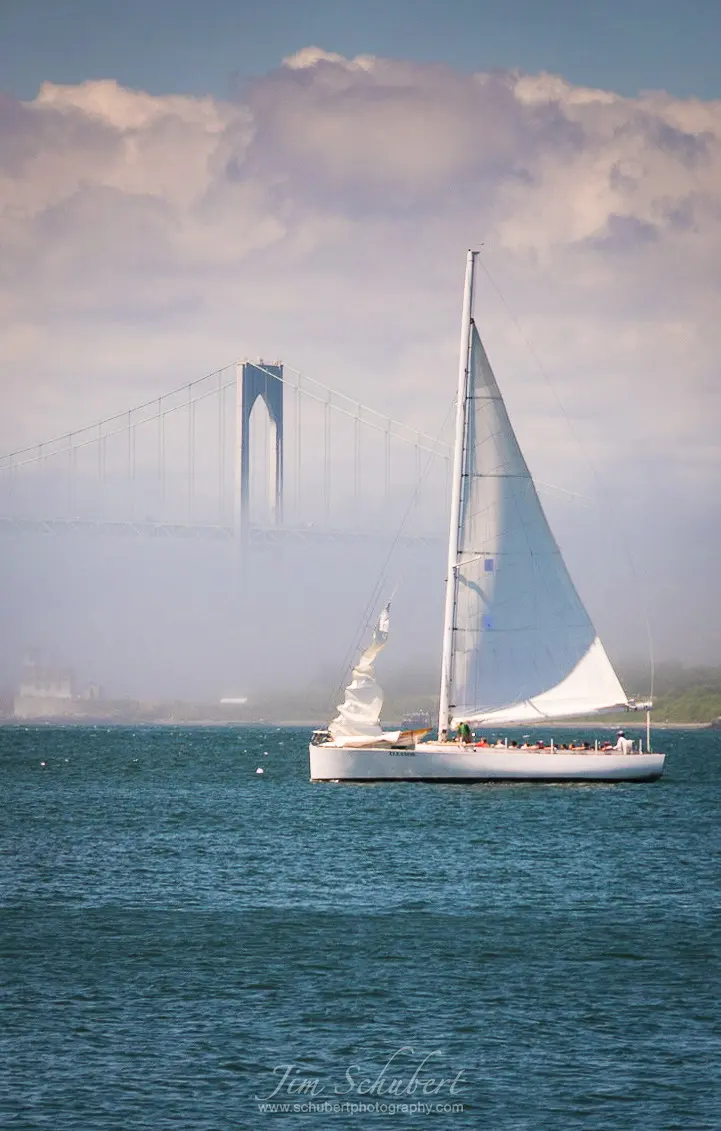
Seascape – On the water or near the water. Sail boats, fishing vessels, crashing waves, sandy beaches, lighthouses, piers, rocks and cliffs. And of course fish, breaching whales, soaring seagulls, and other water based animals.
Abstract – This style is all about capturing shapes and patterns in the outdoors. Cascading hills of rice paddies. Meandering lines formed by windblown desert sands. Silhouettes of craggy oak tree branches.
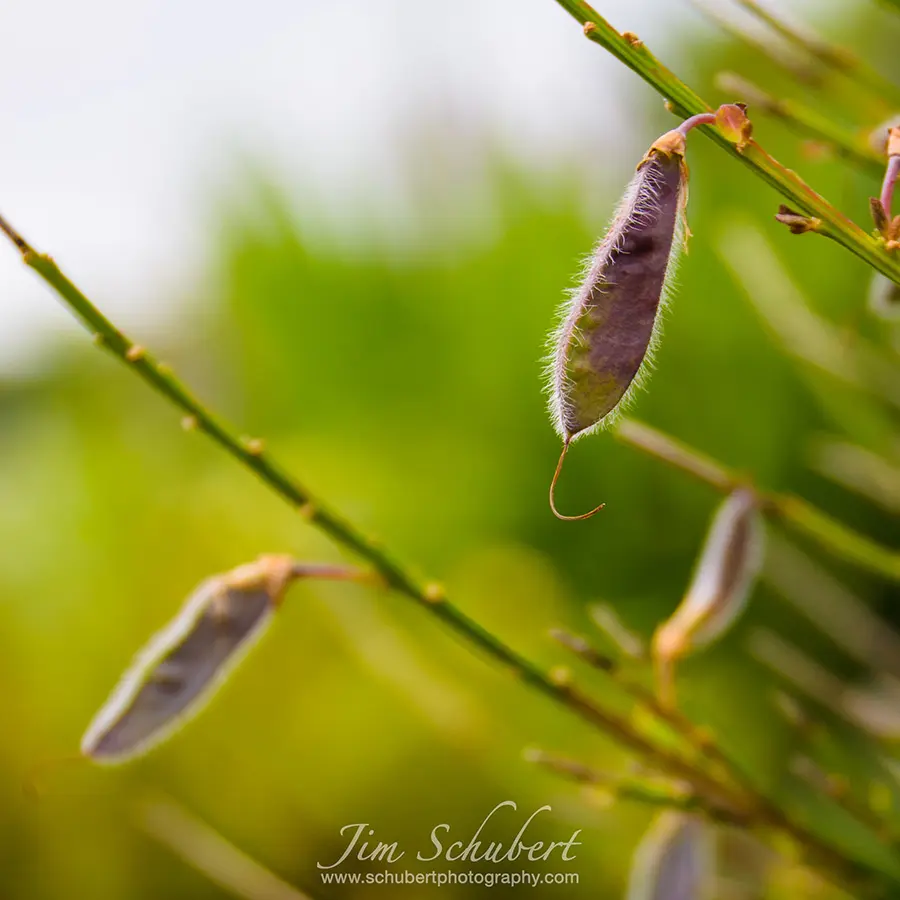
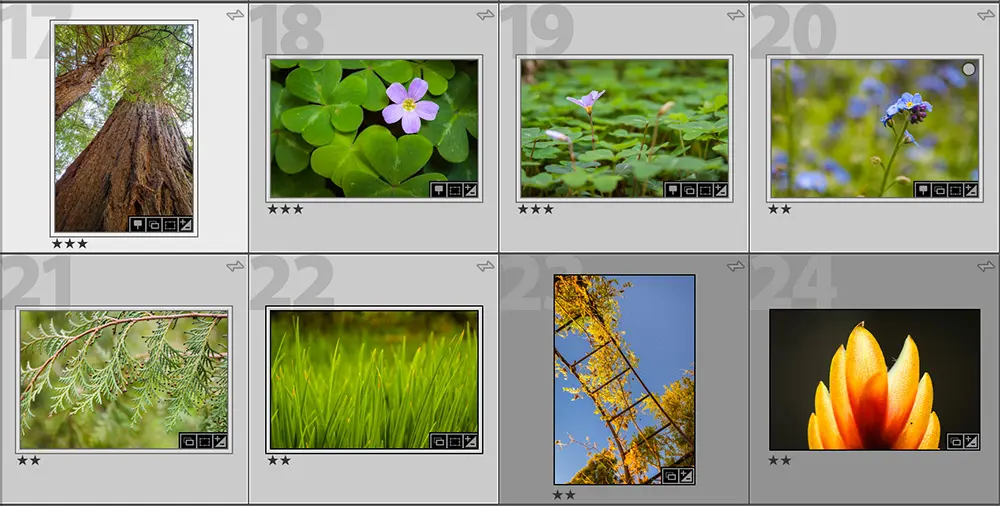
Macro – This is a fascinating style of landscape photography that gets up close and personal with the outdoor and natural world. Fun things to try photographing are insects, flowers, animals, food and any interesting texture or pattern found in nature or an urban setting.
Urban – Cities and towns have their own place in the landscape photography world. Great subjects include city skylines, graffiti covered walls, urban parks, light trails from moving traffic, subways and even abandoned buildings.
Architectural – This style presents almost endless possibilities for creativity. Buildings, homes and other structures can be found in urban settings as well as rural and remote locations. Ideas for subjects to photograph include commercial buildings, churches, temples, mosques, museums, castles, homes, bridges, lighthouses, clock towers, statues and monuments.
Night Sky – Pictures of the night sky are some of the most awe inspiring images. Modern DSLRs make it easy to take long exposures, allowing your camera to capture more stars and other heavenly bodies that even your naked eyes can see. Some wonderful elements to capture in the night sky include stars, the moon, the Milky Way, constellations, meteor showers, comets, a lunar eclipse, planets and star trails.
Seasonal – The changing of the seasons can be a beautiful thing to capture in pictures. Reflections in a puddle after a Spring rain. A heard of buffalo grazing in a field during the Summer months. A path in the woods covered in fallen Fall folliage. Snow covered mountains. These are just a few seasonal photography ideas.
Specialized Landscape Photography Techniques
Long Exposure – Setting your shutter speed to longer times can open up a whole new world of photographic possibilities. Turn clouds into beautiful motion blurs in the sky. Make flowing waterfalls look milky and dreamlike. Capture lightning or fireworks in their full glory.
Light Painting – Another form of long exposure photography, light painting involves using artificial light to either brighten a dark night scene or create your own patterns and shapes with light trails. All you need is a light source like a flashlight or your mobile phone and your DSLR camera and a tripod to make magical light paintings.
Timelapse – Timelapse photography is a wonderful way to show the passage of time using many individual images. The end result looks like a video, even though the processed file is made up of hundreds or thousands of photos. You’ll need a good intervalometer and a tripod for this type of photography.
Panorama – In order to get a wider view that what your camera’s sensor captures, panoramic photography can be achieved by stitching together more than one overlapping image using Lightroom or Photoshop. This type of photography is perfect for sweeping landscapes in both natural and urban settings.
Drone & Aerial – This is a fun, and sometimes expensive, type of photography that involves using a drone or an airplane to capture aerial photos of the earth from above. Drone photography has become wildly popular in recent years as drone prices have dropped and technology and built-in camera quality has improved.
Editing Landscape Photos
Your DSLR camera is capable of capturing large image files. And those files contain lots of luscious editable data. If you’re shooting in RAW (like you should be) you’ll need software in order to process those data files and then publish them, either digitally or in print.
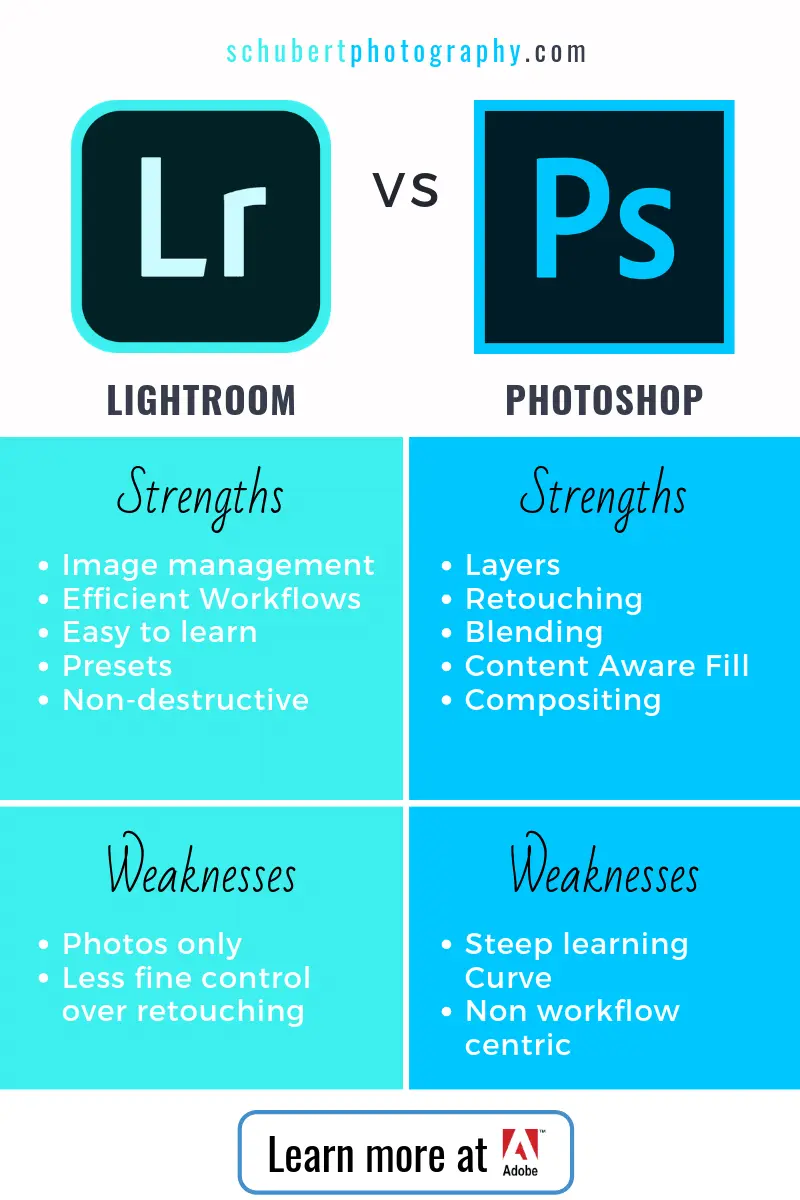
By far the most popular and robust programs for editing photos is Adobe Lightroom and Adobe Photoshop.
Let’s look at the differences and why having both will help you take your raw image files and turn them into something amazing.
Pro Tip:
Adobe offers Lightroom and Photoshop bundled together for less than $10 a month in plan called Creative Cloud for Photographers. You can easily edit, organize, store, and share your full-resolution photos from anywhere!
How To Edit Your Landscape Photos
Lightroom makes it very easy to edit your landscape photography pictures. There’s a natural workflow that’s built into the panel on the right side of the Develop Module. Think of it as a waterfall. Just start at the top and work your way down. Let’s take a look.
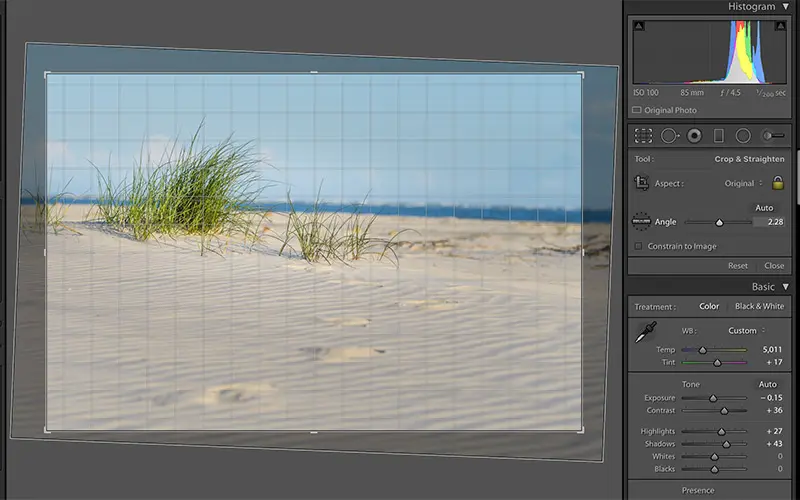
1. Crop & Straighten
The first step in post processing is to crop and straighten your image. If you didn’t frame your image exactly the way you intended in the field, this is where you can quickly adjust that.
Here’s a step-by-step walkthrough to help you crop your photos in Lightroom like a professional.
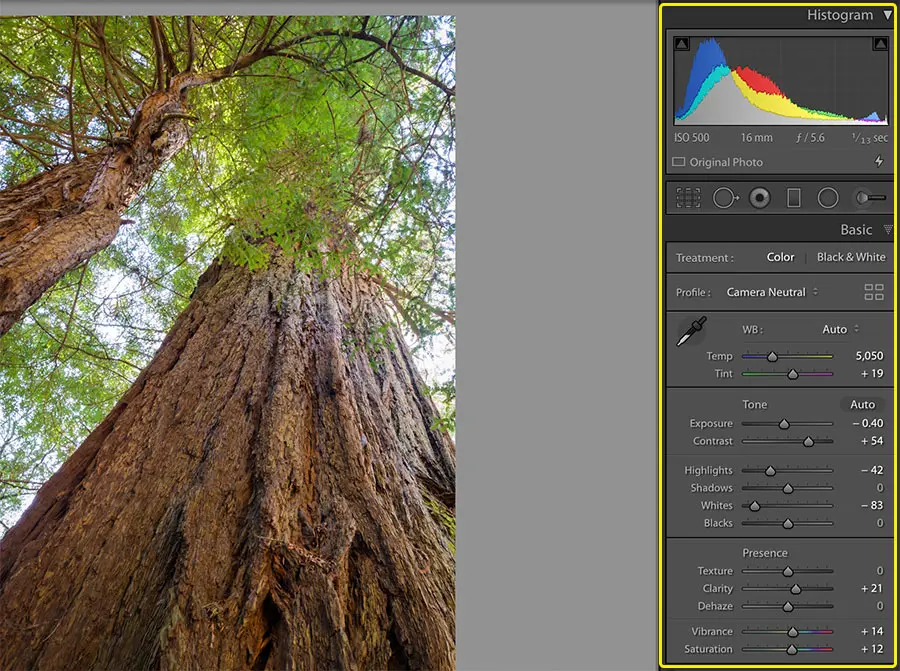
2. Adjust Light & Color
Next, drop down to the Basic panel to adjust the light and color of your image. Again, start from the top of this list and work your way down.
- White Balance
- Exposure
- Contrast
- Highlights
- Shadows
- Whites
- Blacks
- Clarity
- Vibrance
- Saturation
3. Brushes And Gradients
If you have places in your photo you want to make adjustments that won’t affect the rest of the image, you’ll want to use an Adjustment Brush.
And if you have a sky that’s too bright or a section where you want to add a gradual change of light or tone, use the Gradient Tool.
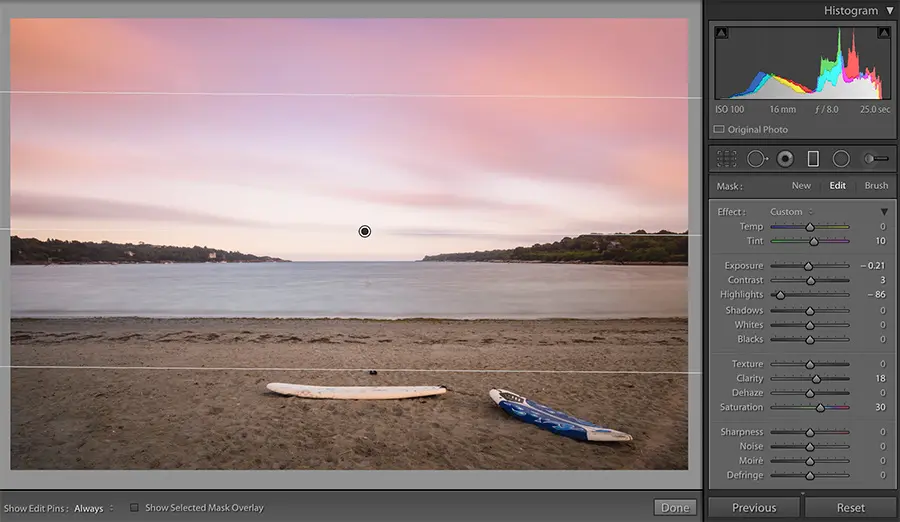
Here’s how I changed the exposure of the sky in a photo I took in Grand Cayman.
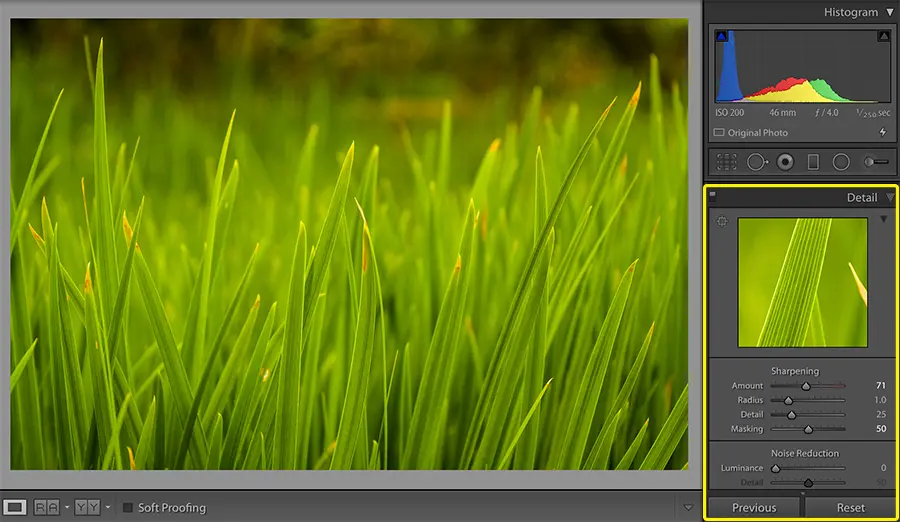
4. Sharpness And Noise Reduction
Lightroom defaults to adding a little bit of sharpness to your images upon import. But if you want to adjust that, drop down to the Detail panel.
If your image has grain (or noise) because you used a high ISO, move the Luminance slider under the Noise Reduction section to remove it or at least lessen the effect.
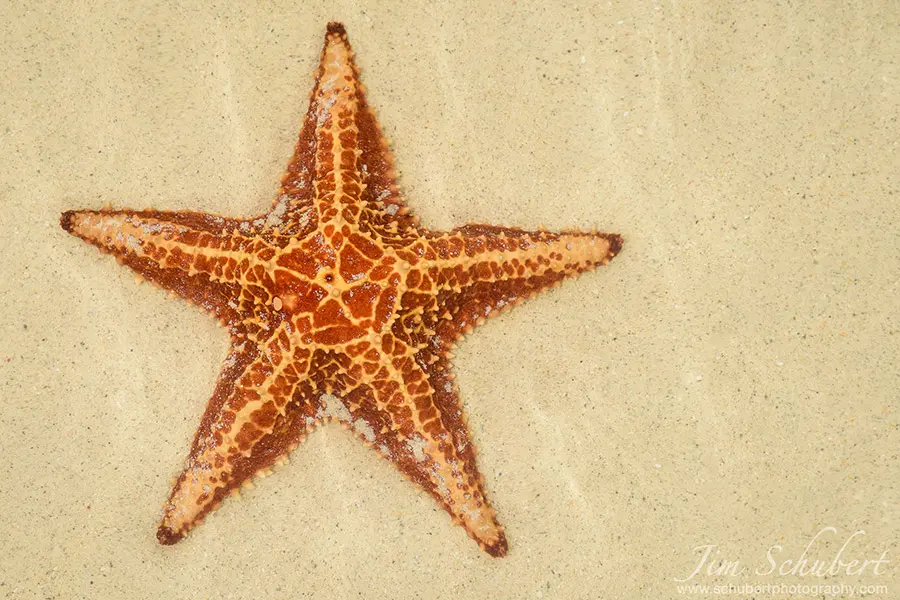
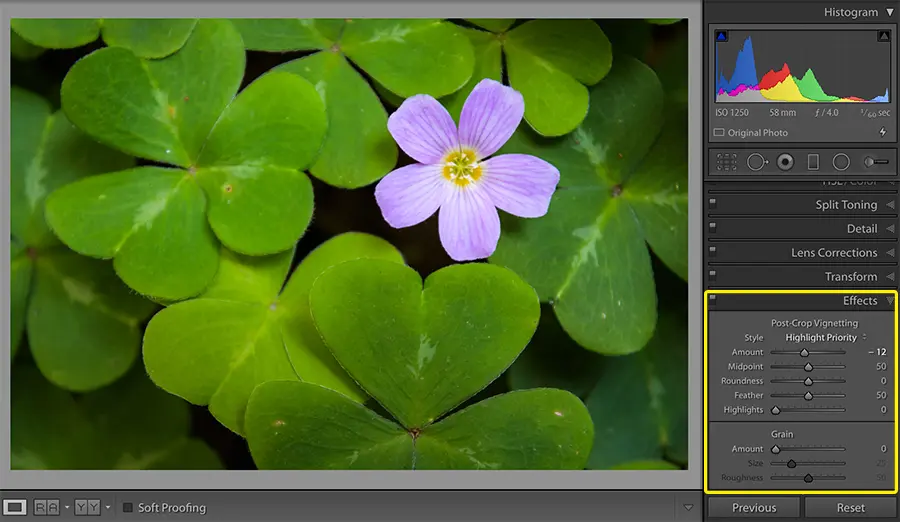
5. Dehaze And Vignette
Next, if you have an area of haze, such as sun rays, fog or water glare, use the Dehaze slider to reduce it.
Here’s an example of making my subject clearer by removing the cloudiness of water I was shooting through when photographing a starfish.
If you want to draw your viewer’s attention even more towards your subject, use the Vignette slider to add subtle dark edges at the corners of your image. Just be sure not to overdo it here. Adding the effect is fine, but not so much that it becomes obvious or distracting.
6. Select & Export Your Photos
Once you’re finished processing your images, it’s now time to export them. You can export them as final versions of your image ready to share, or you can refine your edits even further by exporting them to Photoshop. This could be very helpful if you want to dodge and burn your photos to create more depth and realism. If you have multiple images to export, select all of them at once and choose Export.
How select multiple photos in Lightroom Classic.
How select multiple photos in Lightroom CC.
Sharing Your Landscape Photos With The World
Now that you’ve captured some beautiful landscape photography images, it’s time to share them! Today, there are more places than ever to get your work noticed.
View this post on Instagram
Best Online Photo Sharing Sites & Portfolio Websites
View this post on Instagram
Best Practices For Sharing Your Landscape Photography On Social Media
Before you jump right into becoming the most popular kid in school, consider a few best practices for sharing your pictures on social media.
- Export Sizes & Shapes: Thieves are everywhere! Don’t ever share a full resolution photo online, unless you want it stolen and possibly used or sold without your permission. Each social media platform has their own ideal post size. Make sure you resize your photo appropriately before you share it.
- Add Watermarks: One extra step you can take to help ensure your photos aren’t used without your permission is to add a watermark to it. You can do this in Lightroom or Photoshop pretty easily. It doesn’t have to be large or distracting. Something inconspicuous with a 50% opacity or less will do just fine.
- Copyright Your Images: This may be taking it to another level. But you may also consider getting a formal copyright for your images before sharing them online. This will give you an extra level of protection and better grounds to take legal action if necessary.
How To Make Money With Landscape Photography

Now that you’ve started to practice taking beautiful landscape pictures, you might consider making money with your new hobby. Even if it’s just something you do on the side, you’d be surprised how easy it is to sell your photos.
7 Ways To Sell Your Photos Online And Offline:
- Stock Photo Websites: These are sites where businesses and others go to find stock photography to use in their advertisements and other media. They’re not buying your photos, per se. They’re purchasing a license that gives them permission to use your artwork. You still retain the rights to your images. Here are some of the best places to sell your photos online:
- Portfolio Websites: Just like the stock photo websites above, you can also sell your images through your own portfolio account like SmugMug or 500px.
- Pitch Media Outlets: Google some magazines and online media outlets who regularly feature pictures similar to yours. Then send them an email or message through their website asking to do special assignments for them.
- Local Shops: Approach local gift, art and tourist shops to ask if you could sell your prints through their store.
- Art Festivals: There’s a pretty big circuit of traveling art shows out there. Do some research and see if you can get linked into one where you can sell your photo prints.
- Become An Online Influencer: Build an Instagram or Pinterest following with your photos and attract brands who want you to help them advertise.
- Contract For Local Businesses: Approach local businesses about doing photo shoots for their brand. This is especially useful if you’re proficient in drone or architecture photography, because not everyone takes those kinds of pictures. Any kind of business from real estate companies to bike shops to law firms could use your special photography skills.
[Infographic] The Ultimate Landscape Photography Guide For Beginners
If you made it this far down the page, congrats! You’re likely going to find great happiness and success as a landscape photographer. Whether you want to make it a profession or just a weekend hobby, you’re now one step closer to taking beautiful pictures that will inspire others to get outside and make the most of what the natural world has to offer.
Here’s a handy Landscape Photography Guide For Beginners Infographic you can refer back to anytime for a quick recap of what you’ve learned.
Happy shooting!
Share this Image On Your Site

Last update on 2026-06-26 / Affiliate links / Images from Amazon Product Advertising API