Dodge And Burn Photoshop Images The Easy Way
Learning how to dodge and burn Photoshop images can add incredible depth and dimension to your landscape photography. But if you’ve never tried it, you might get frustrated learning how. That is, unless you use a dodge and burn tool like Lumenzia to make it effortless.
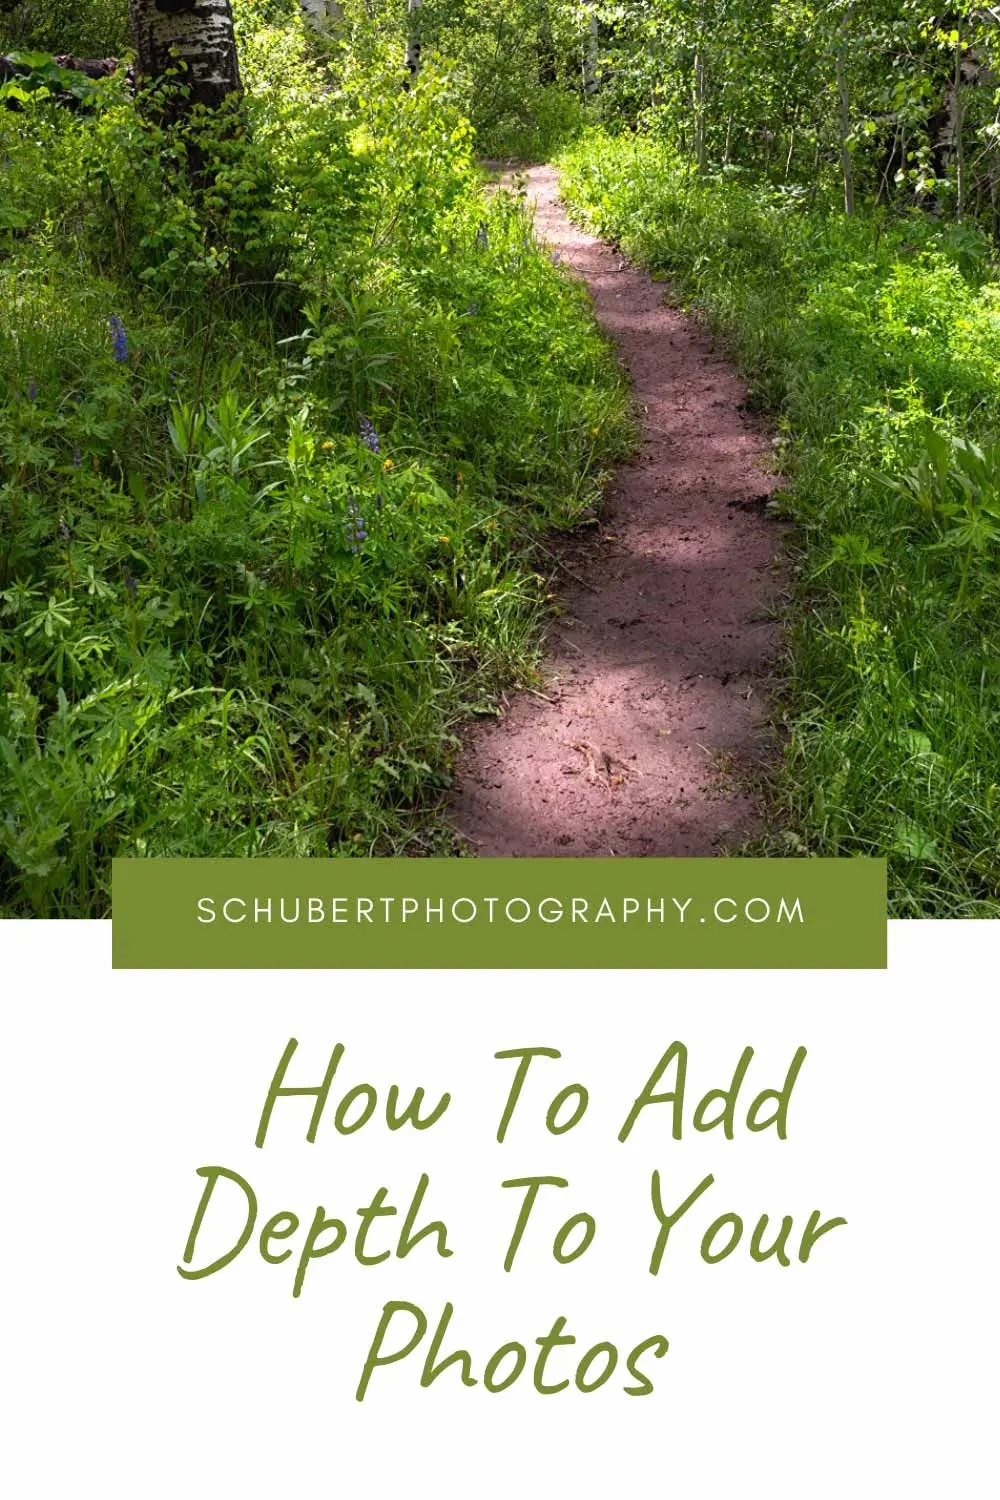
In the video above, I walk through a dodge and burn Photoshop tutorial using a photo of a dappled sun-lit trail in Colorado. I want to accentuate those areas of the photo where sunlight is falling on the trail and catching some of the tips of foliage that line the pathway. So watch to see how Lumenzia v8 allows me to use an a quick and easy dodge and burn technique that will change the way you edit your photos.
Creator Greg Benz has made this fantastic tool to assist photographers in creating quick and easy luminosity masks which act like a stencil when you’re dodging and burning photos in Photoshop. It’s as close as it gets to being able to auto dodge and burn Photoshop images. You can download it here: https://gregbenzphotography.com/lumenzia/
3 Easy Steps To Dodge And Burn Photoshop Images
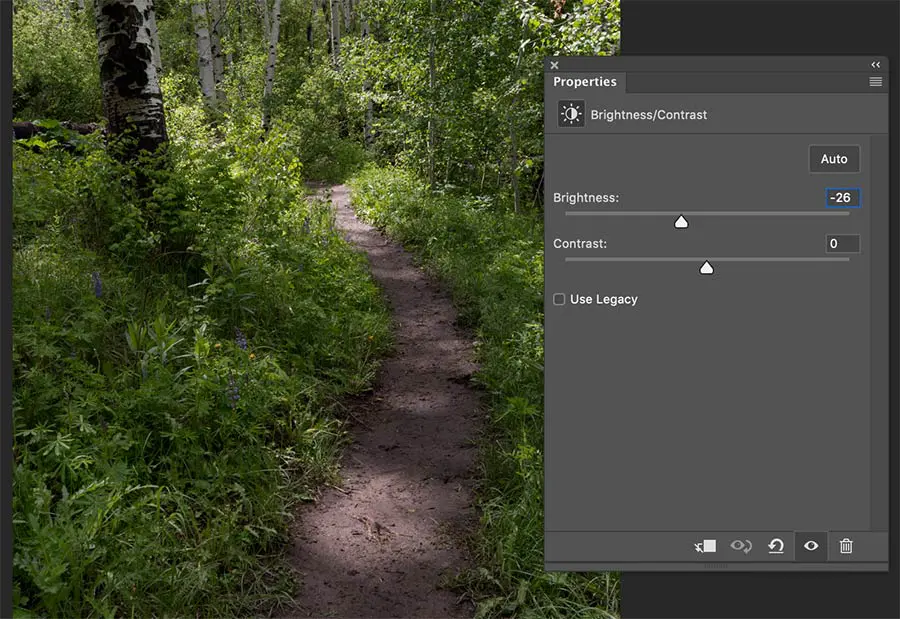
Step 1: Adjust overall brightness and contrast
So we start by darkening our image slightly with a Brightness adjustment and a Levels adjustment. I do this because I prefer to start with a darker image and focus on dodging more than burning. Dodging is when you lighten select areas of your image, whereas burning, just like burning a piece of wood, makes those areas darker.
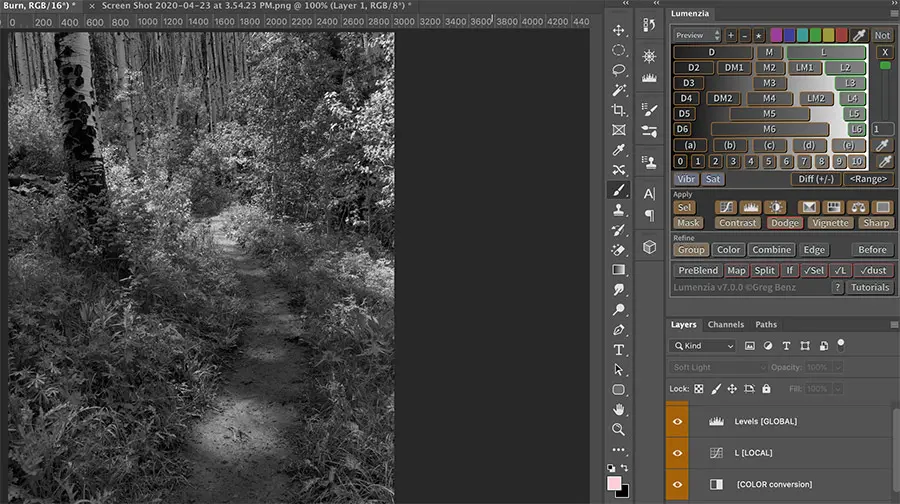
Step 2: Create a luminosity mask with Lumenzia
Once we’ve darkened the image a bit, we choose a Lights 1 selection from the Lumenzia panel. This gives us a good starting point to use as a stencil, which will help us stay within the highlights we want to target when we use our Photoshop paintbrush. And before we start painting, we use the Global Levels adjustment that’s built into the Lumenzia grouped layer that’s created for us to fine tune our luminosity mask.
Step 3: Dodge and burn your photo
Now we’re ready to paint on our image. We simply adjust our brush size and keep a middle-of-the-road opacity and begin painting on those areas of our image we want to accentuate.
Pro Tip:
Use A drawing Tablet To Dodge And Burn In Photoshop
Discover the difference of using natural pressure sensitivity like an artist. It will change the way you post process!
Table could not be displayed.
How Do You Dodge And Burn Photoshop Images?
Now that you’ve seen how I like to dodge and burn landscape photos in Photoshop, what do you think? Is there a way you find that’s even easier than this? If so, let the Schubert Photography community know in the comments below.
Last update on 2026-07-27 / Affiliate links / Images from Amazon Product Advertising API