The Complete Guide To Sunrise & Sunset Photography
Ready to master sunrise and sunset photography? This guide contains the tips you need for camera settings, dslr equipment and the best time to take pictures outside. Get ready to nail your next sunset or sunrise photography shoot!

Dunes awaken on Fripp Island, South Carolina: 16mm | f/11 | ISO 400 | 1/160s
Quick Links
Why Sunrise And Sunset Is The Best Time To Take Pictures Outside
In short, sunrise and sunset provide more dramatic lighting for your images than any other time of day. The low angle of the sun in the sky refracts light in such a way that covers your subject in glorious rich color. Furthermore, the diminished intensity of the sun’s rays in the morning and the evening provide you the ability to capture more dynamic range of light in your image. I explain how to take advantage of these conditions in a video I made called 6 Sunrise Photography Tips For Jaw Dropping Images.
Sunrise & Sunset Lighting
- More dramatic lighting
- Gloriously rich colors of yellow, orange, red and magenta
- Easier to capture more dynamic range in your image
Vs.
Bright Midday Sun
- Casts harsh shadows
- Less dynamic range
- Easy to overexpose the sky
By contrast, the harsh light of a sunny midday casts hard shadows onto the landscape. And it can be very easy to overexpose the sky in this situation. Plus, there’s just generally less dynamic range available to you when post processing. So this isn’t usually the best time of day to take pictures outside.
Golden Hour Is The Best Time To Take Pictures Outside
Depending on the time of year and your location, the best time to take photos outside is roughly 1-2 hours before and after sunrise and sunset. Doing this will ensure you take full advantage of Golden Hour. This is the time the earth is bathed in a soft golden light that makes photos dramatic and stunning.

Castle Hill Lighthouse in Newport, RI during Golden Hour: 24mm | f/7.1 | ISO 200 | 30s
The Best Camera Settings For Sunset And Sunrise
Light changes so quickly in the morning and evening. So the sunrise and sunset camera settings you use will depend on whether or not you are using neutral density filters or not. But in general, you’ll need to learn how to use these camera settings for sunrise and sunset to nail your shots.
#1 Aperture
For most landscape photos at sunrise and sunset, you’ll want to use a mid to small aperture. Somewhere between f/8 – f/16 is a good range. Although, your subject and the effect you’re aiming for will dictate this camera setting.
Using this range of aperture will help you keep more of what’s in your frame in focus. So if you’re including the sun in your photo, a higher number aperture may allow you to capture sunbursts.
Although, if shutter speed is more important, you could always put your camera in Shutter Priority mode. Doing this will let your camera decide how big or small to make your aperture as you manually choose your shutter speed.
#2 Shutter Speed
This is the camera setting that will vary greatly on whether you use neutral density filters. But in general, during sunrise photography, the brighter the sun becomes as it rises, the faster the shutter speed you will need to use. And during sunset photography, the dimmer the sun becomes, the slower the shutter speed you will need to use.
If you’re using a tripod, you can slow your shutter speed down as low as you’d like. But if you’re shooting handheld, I wouldn’t go much below 1/80 seconds. Otherwise, you’ll blur your image due to camera shake.

Palmetto at sunrise on Fripp Island, South Carolina: 16mm | f/11 | ISO 100 | 1s
#3 ISO
Keep your ISO as low as your camera will allow in order to minimize noise. Shoot for ISO 100, if you can. It’s tempting to use a higher ISO to compensate for lower light conditions. But this is exactly why you should use a tripod and shutter release cable in order to slow down your shutter speed to let more light hit your camera sensor.

#4 White Balance
This is one setting I usually leave on Auto setting. Lightroom and Photoshop make it incredibly quick and easy to adjust color balance to your desire. So this will be one less setting you need to worry about. But if you’re dead set on making everything manual, then opt for a warmer color temperature setting like 5600k – 6500k.
Pro Tip:
Bracket Your Sunrise And Sunset Images To Capture More Dynamic Range
If you plan not to use neutral density filters for your next sunrise or sunset photoshoot, then bracket your images. Bracketing is a quick and easy way to use multiple images to capture the shadow, midtone and highlight details you want in your sunrise and sunset photos. The process requires taking a quick series of identical images but changing one variable (usually shutter speed) between each shot.
Bracketing is most commonly done with a series of 3 or 5 images. You can do this manually or set your camera to automatically bracket. Then you can merge these images together as an HDR image in Lightroom. The end result will be much more usable data in one image file than you would have been able to get with one shot.

What Camera Gear Do You Need For Sunrise And Sunset Photography?
Sunset and sunrise photography present unique challenges because of rapidly changing light. For this reason, you’ll need the right camera accessories to capture those stunning landscape photos you’re after. Let’s take a look at the must-have gear you’ll need.
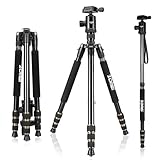
#1 Tripod
Using a tripod is essential to taking photos at sunrise and sunset because you will typically use slower shutter speeds to let more light into your camera’s sensor. So there’s more of a chance that camera shake will blur your image.
If you’re hiking to your location, you’ll want to pack a lighter, carbon fiber tripod or a mini flexible tripod like the Gorillapod 3k.
I typically carry this Zomei tripod because it’s light and easy to setup.
#2 Wide Angle Lens
If you plan to photograph spacious landscape images, a good wide angle lens is a must. It will give you a wide field of view, enabling you to capture more of the scene in your frame. You can always crop your image in Lightroom later. But you can’t go back and add more of the scene, unless you plan to stitch photos together.
#3 Shutter Release Control
Another easy way to reduce camera shake is to use a shutter release control. This can be as simple as a standard cable release or a remote Bluetooth device like the Alpine Labs Spark.
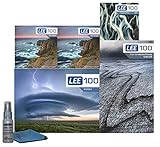
#4 Neutral Density Filter Kit
Neutral density filters act like sunglasses for your DSLR. So these filters are especially important if you’re including the sun itself in your composition. ND filters allow you to use slower shutter speeds to allow the right amount of light to capture your foreground without blowing out the highlights in the sky.
You can use solid neutral density filters to reduce the amount of light hitting your camera sensor for the entire frame. Or you can be more selective by using a graduated neutral density filter to only reduce light in the sky, for instance. Both of these are also what you need if you want to shoot long exposure photos.
My favorite nd filter kit is the Lee Filters Landscape Kit.
How To Compose Your Sunrise & Sunset Photos
As with any type of photography, it’s important to compose your sunrise and sunset photos for maximum impact. So be sure to use these landscape photography composition techniques to make the most of your landscape images.
-
Use the rule of thirds.
-
Place something interesting in your foreground.
-
Use leading lines to draw the viewer’s eyes through the frame.
-
Level your horizon.
-
Find patterns and textures to add interest to your image.
-
Change your point of view every few shots.

Level horizon at sunset in Grand Cayman: 80mm | f/11 | ISO 100 | 1/20s
How To Plan Ahead For Your Next Sunset Or Sunrise Photography Shoot
Getting good sunrise and sunset photos takes planning. Some things to take into consideration are:
- Sunrise and sunset times
- Weather
- Appropriate clothing
- Location and vantage point
- Local laws and regulations (ie: park rules and opening/closing times)
Photographer’s Ephemeris: The one tool you need for your next sunrise or sunset photography shoot
Want an easy app to help you plan where and when to be for the best sunset and sunrise photo shoots? One of the best around is called The Photographer’s Ephemeris. This app will help you know exactly where the sun will rise and set on the horizon how it will fall on the landscape.
For instance, if you’re planning to photograph the Golden Gate Bridge at sunrise, wouldn’t it be nice to know where the sun will actually rise?
Sunset And Sunrise Photography Tips
#1 Visit your location ahead of time
By doing this, you’ll get the lay of the land. You’ll be able to choose your best vantage points ahead of time. In other words, you won’t be rushing around trying to figure things out the day of your photo shoot.
#2 Arrive on location earlier than you think you should
Inevitably, something will go wrong the day of your photo shoot. It might be something as small as fiddling around with the right camera settings. When taking sunrise and sunset photos, time is of the essence. So the earlier you can arrive on location the better.
#3 Wait for clouds to create more drama in the sky
Clouds may seem like something you’d want to avoid during a sunrise or sunset photography session. But they catch so much of the color created by the rising and setting sun. So this will create drama and gives your scene much more of a mood. If you don’t see clouds catching those colors you were hoping for, just wait a little while longer. Oftentimes clouds become more filled with dramatic color after the sun has already gone below the horizon.

Colorful sunset clouds in the Gulf of Mexico | 200mm | f/5.6 | ISO 100 | 2s
#4 Photograph multiple subjects
Don’t kick yourself later when you realize you took 300 photos of the same thing, trying to get it “just right.” Plan in advance to move around and capture different points of interest. Similarly, on the day of your photo shoot, be sure to look behind you every so often. Because sometimes, the best shots are simply waiting right there out of view.
#5 Be prepared to photograph (or film) the unexpected
Of all the sunset and sunrise photography tips I could give you, this one may be the most important. Once, after a sunrise photography shoot, I spied a long line of about 50 pelicans flying by just overhead catching the first morning light. And where was my camera? Right, neatly packed away in my bag with the rest of my gear. Tripod securely fastened to the side. Long sigh…Could I have fumbled to get everything out and setup properly in time? Probably not. My heart sank. But as pelicans often do, they came back around for another shot. This time, I at least had my iPhone ready to record.
#6 Use hyperfocal distance to get everything in focus
Finally, learn how to use hyperfocal distance to get everything in your frame tack sharp, from foreground to background. You can use a handy chart from Visual Wilderness to help with this.

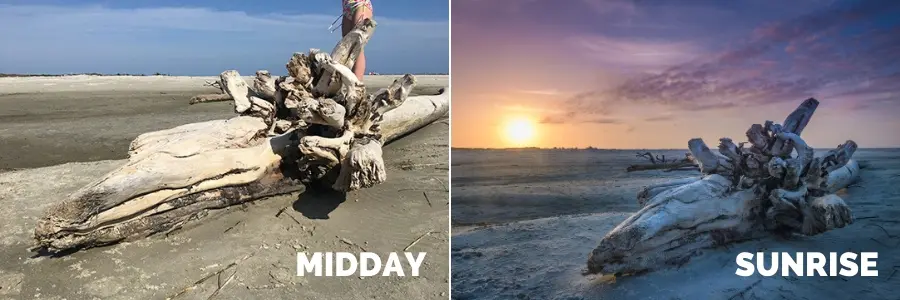
Driftwood at sunrise: 16mm | f/11 | ISO 100 | 1/25s
What Sunset And Sunrise Photography Tips Do You Have?
So now that you’ve learned more about sunset and sunrise photography, what tips can you share with others here?
Let me know in the comments below.
And above all, happy shooting!
Last update on 2024-04-25 / Affiliate links / Images from Amazon Product Advertising API
Hello! I just finished reading this article. Very good tips, and nice photos. I believe there is an error though at the beginning of the article.
“ Although, if shutter speed is more important, you could always put your camera in Aperture Priority mode. Doing this will let your camera decide how big or small to make your aperture as you shoot.”
Aperture priority mode will allow the photographer to adjust the aperture manually, and the camera will automatically adjust the shutter speed, the opposite of what you describe.
Once again, I love the article, I just thought I would point this out.
Paul, good catch, my friend! I’m not sure what I was thinking when I typed that. But it’s fixed now. Happy shooting!